The Real Visa Processing Timeline 2026: When Each Document Is Reviewed

The Real Visa Processing Timeline (When Each Document Is Reviewed)
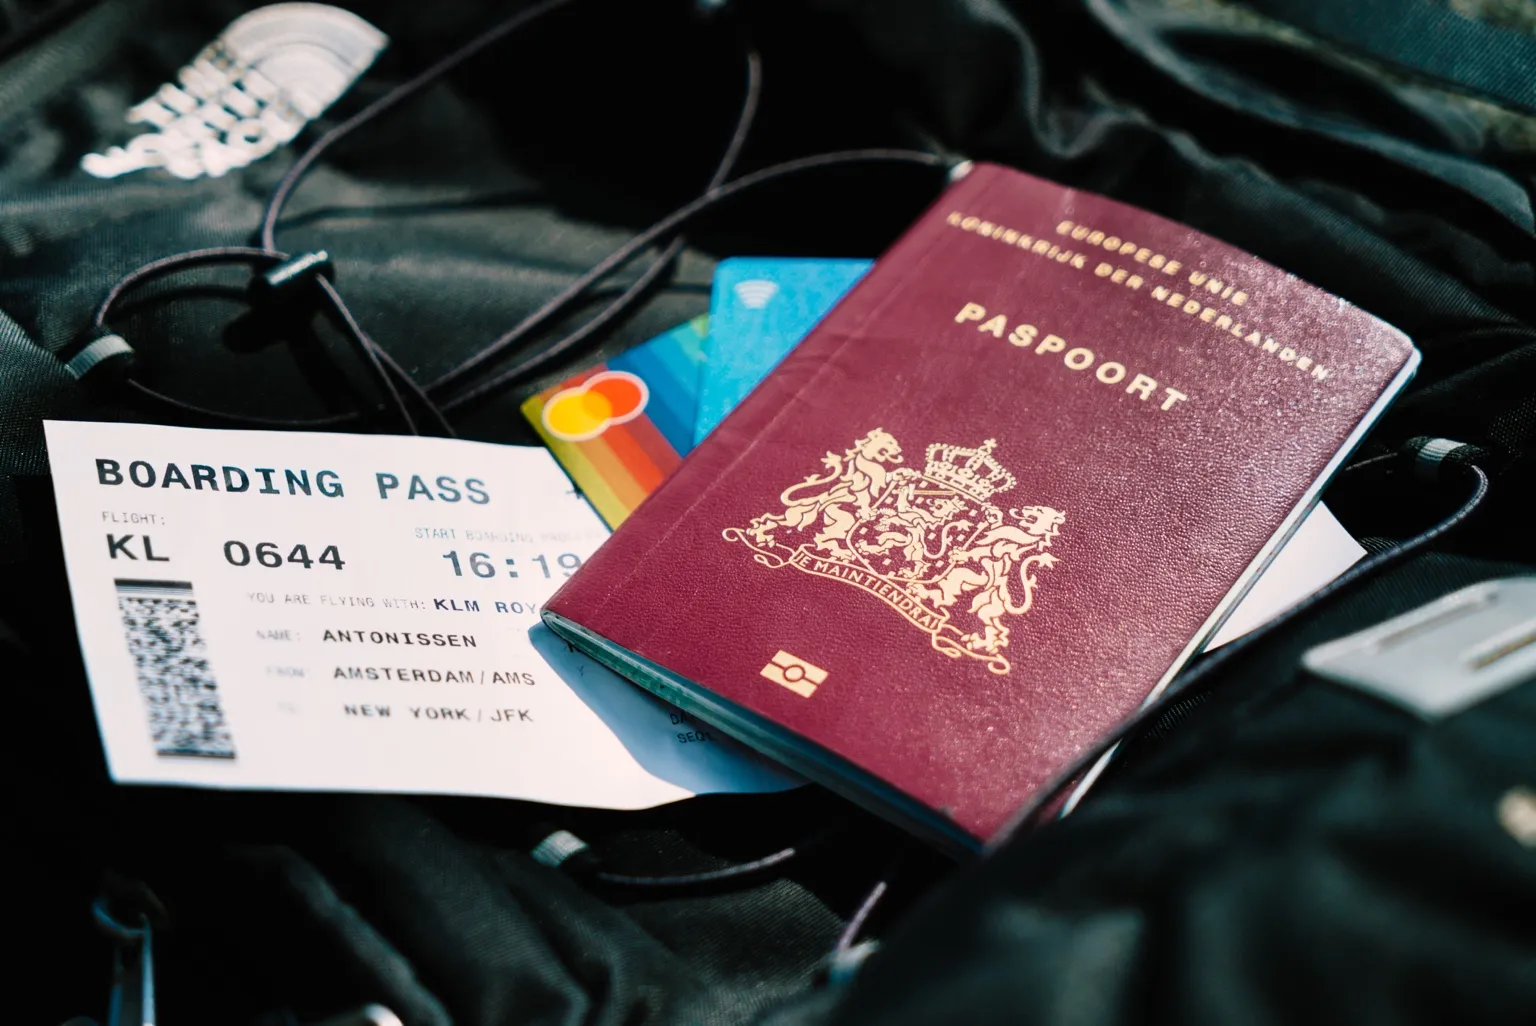
Your appointment is next week, your bank statement is dated last month, and the officer is staring at a travel date that no longer matches your leave letter. That is how good applications get slowed down. Visas fail on timing more than effort: the right documents, but pulled from the wrong moment, in the wrong version.
We are going to map the whole process as a timeline, from form filling to submission, verification, and travel day. You will know exactly when each document gets created, scanned, compared, refreshed, or carried again, and what triggers extra requests. With that clarity, you can plan updates without changing your story, keep every date aligned, and walk into the appointment with a file that holds up under cross-checks anywhere. Time your flight to your appointment date with a verifiable dummy ticket booking that keeps your dates consistent.
A clear visa application timeline keeps every document aligned from form filling to submission and travel day. For the complete 2026 framework on building consistent, verifiable travel documentation, read our main hub: Flight Reservation for Visa 2026: Complete Embassy Approved Guide.
- Start With A Backward Timeline
- Application Form Stage: Where Most Future Problems Are Born
- Core Proof Stage: The Documents That Decide Credibility
- Travel Plan Proof Stage: When Your Itinerary Becomes Evidence
- Submission Day: What Gets Used At The Counter Vs What Gets Used Later
- After Submission: Verification, Cross-Checks, And Additional Document Requests
- Decision And Travel Day: The Second Time Your Documents Get Used
- Keep Your Schengen File Consistent From Appointment To Boarding
In the initial phases of your visa application, getting your travel plans documented early can prevent many common headaches down the line. Whether you're preparing supporting evidence or filling out forms, having concrete proof of your intended travel dates is essential for consistency. This is where a dummy airline ticket generator with PNR for visa becomes an invaluable tool for early-stage visa planning. These specialized services let you generate realistic temporary flight itineraries that serve as verifiable PNR dummy tickets without any financial commitment or risk of booking real flights that might change. By creating these documents upfront, you can align your proposed trip dates perfectly with appointment slots, employer leave approvals, and insurance coverage periods. The process is simple, secure, and designed specifically for visa purposes—delivering professional PDF reservations that embassies commonly accept as proof of travel intentions. This approach eliminates the stress of last-minute adjustments and helps maintain a coherent narrative throughout your entire application file. Tools like these make the whole preparation phase much smoother by providing risk-free options that you can update as needed. They ensure you have the right onward travel proof from the very beginning of your planning. To explore how these generators can simplify your process and boost your confidence in early preparations, check out our guide on flight reservation with PNR for visa. Start building your strongest application today with the right documentation strategy.
visa application timeline is essential for travelers in 2026—understanding when each document is required helps you avoid last-minute stress, missing paperwork, and costly delays. 🌍 A clear timeline ensures your proof of funds, dummy ticket, hotel booking, insurance, and travel plan all align perfectly with embassy expectations.
Follow a structured visa application timeline to streamline submissions, keep document dates consistent, and boost approval odds. Pro Tip: Prepare your travel itinerary and dummy flight reservation early so all supporting documents match your intended entry/exit dates! 👉 Start your application now and avoid avoidable visa rejections.
Last updated: June 2026 — Verified against 2026 embassy guidelines, Schengen/US/UK requirements, and global visa processing trends.
Start With A Backward Timeline

A Schengen file and a US DS-160 package both get judged in stages, not in one glance. If you plan those stages backward, you stop getting surprised.
The “Deadline Stack” That Controls Everything
Start from the date that cannot be moved. For a Schengen short-stay (Type C) trip, that is usually your first day of entry, because insurance dates, leave dates, and your flight plan all orbit that entry.
Then stack the other deadlines above it, in the order that can block you:
-
Appointment or biometric slot date (a common choke point for UK Standard Visitor, Schengen via a VAC, and Canada TRV workflows)
-
Latest safe submission date based on published processing ranges
-
Buffer for extra document requests after submission
-
Buffer for reissued items, such as updated bank statements or employer letters
For many routes, the slot date becomes the deadline. A Schengen appointment sets the statement period you can show. A US interview date sets which letter wording will look current. A Canadian biometrics appointment can force early final uploads.
Next, pick a “freeze date.” That is the day you stop making big changes to your story. If your US B-1/B-2 DS-160 is submitted and you later rewrite travel dates in a supporting letter, you create a comparison gap.
If your trip is anchored to a fixed event, treat that event as a hard constraint. A Japanese tourist planning around a festival week or a business meeting in Dubai creates a narrow window. Your document timeline must match that window, not your wishful calendar.
Document Categories By Why They Exist (So You Stop Over-Collecting)
Different visa systems require different proof. Australia’s visitor stream often focuses on a credible purpose and financial capacity. Many Schengen files get evaluated on consistency across dates, locations, and trip length. Group documents by the question they answer.
Use these categories to decide what you create first:
-
Identity and status: passport, residence permit, prior visas, civil status documents when relevant
-
Eligibility for the visa type: student enrollment for a French long-stay student route, business invitation for a UK business visit, relationship evidence for a family visit
-
Financial capacity: statements, income proof, tax documents, sponsor proof when applicable
-
Return logic: employment ties, ongoing study, property, dependent responsibilities, long-term obligations
-
Trip logic: dates, routing, stay plan, and anything that makes the itinerary feel realistic
The timing is different by category. Identity documents get used early, including during appointment booking. Financial documents get read later and compared against your narrative in Schengen and Canada TRV reviews. Trip logic gets judged as a coherence test.
If you are applying for a Netherlands Schengen visa and your leave letter says 12 days off, but your itinerary implies 16 days, you did not fail a checklist. You failed a logic test. Categories help you build logic first, then attach proof.
Freshness Windows: When “Recent” Stops Being Recent
A common refusal trigger is not the document itself. It is that the document looks stale at the moment it is reviewed. UK Standard Visitor reviewers look for recent financial activity that matches your stated income. Canada TRV reviewers look for continuity in funds and employment across the period shown.
Plan “freshness windows” instead of guessing. Create three time bands:
-
Same-week documents: appointment confirmations, employer letters dated close to submission, and letters that can be updated quickly
-
Same-month documents: bank statements, payslips, and proof that should cover the most recent period without gaps
-
Stable documents: passports, civil documents, long-term contracts, and registration papers that do not change week to week
Attach each band to a real moment. For a Schengen application submitted on April 10, you want statements that run close to April, not ending in February. For a US interview in June, you want your supporting set to reflect your current employment, not a job title you held last year.
When your timeline stretches, update only what needs updating. If your flight routing shifts after you booked an appointment for an Italian consulate, update the itinerary logic, but keep your purpose and dates consistent across the rest of the file.
Build A “Cross-Check Sheet” Before You Touch Any PDFs
Whether you are submitting a German Schengen packet through a VAC or a US online form, most problems come from a mismatch, not missing documents. Different documents are produced by different systems, and then compared as one story.
Create a single cross-check sheet before you generate any PDFs. It should include:
-
Full name exactly as on the passport, including spacing and order
-
Passport number, issue date, expiry date
-
Address formatted one way, with one consistent postal code style
-
Employer name and job title written one way
-
Trip dates as a single source of truth, including departure and return
-
Sponsor details, if relevant, written exactly as in sponsor documents
This matters in predictable places. German Schengen packets are structured and heavily scanned. US DS-160 entries can be compared against interview answers. A small mismatch can trigger a credibility question.
Use the sheet to run a “three-document test” for a Schengen or UK application. Check that your application form, your employer letter, and your travel dates all match.
Decide Early What Must Be Original, What Can Be Digital, What Needs Translation
Format mistakes waste weeks because they show up at the appointment window, not during preparation. Many Schengen VACs scan documents and return originals, but they can still refuse a document if it is presented in the wrong form.
Decide format early using the mission checklist for your destination, whether it’s a Schengen VAC submission or a Canada TRV upload. Then build your packet around three format rules:
-
Original-sensitive items: civil documents, documents that rely on stamps or seals, and some invitation letters
-
Digital-friendly items: bank statements from secure portals, online tax transcripts, confirmations where accepted
-
Translation-dependent items: anything not in the accepted language set for that visa route
Translation is not just language. It is identifiers. If your Spanish Schengen application includes a local-language bank statement, the translation must preserve names, masked numbers, and the statement period so a reviewer can compare it.
Also, decide what you will carry on the travel day. Travelers entering the UK sometimes get asked for evidence that matches the purpose and duration they stated. Carry the few documents that prove the same story in a clean, readable way.
With the timeline locked, the application form becomes the anchor, whether that is a Schengen form, a UK online application, or a DS-160.
Application Form Stage: Where Most Future Problems Are Born
Once you submit a form, you create the reference point that every later document gets measured against. Here, we focus on locking your answers so they survive scanning, verification, and follow-up questions.
The Form Is A Comparison Tool, Not Just Data Entry
Treat every form field as a promise. A Schengen Type C application, a UK Standard Visitor form, and a Canada TRV profile all do the same thing. They give the reviewer a baseline story.
Then the reviewer starts comparing:
-
Your travel dates vs your leave approval dates
-
Your employment start date vs your payslips and tax records
-
Your address history vs your bank and identity documents
-
Your declared funds vs your statement activity and income pattern
So the goal is not to “fill it in.” The goal is to build a story that can be cross-checked without confusion.
Use a two-pass approach that prevents silent mistakes.
Pass 1: Draft For Accuracy
-
Fill the form slowly.
-
Save a screenshot or PDF copy of every page as you go.
-
Record the exact wording you used for employer name, role title, and address.
Pass 2: Stress-Test For Comparisons
Ask these questions before you hit submit:
-
If a Schengen officer checks the trip length, will your dates match every supporting page?
-
If a UK caseworker scans your salary, does your stated monthly income match what the statement shows?
-
If a US consular officer asks your reason for travel, can you repeat it without adding new details?
Small differences create big friction. For example, “two-week trip in May” sounds harmless. But if you typed May 03 to May 17, and your leave letter says May 06 to May 20, you now have two timelines.
Fixing it later is harder because the form becomes the anchor. Updating one document then creates a mismatch with another.
Passport Data: The Single Most Reused Input
Passport details are copied into appointment bookings, fee receipts, courier labels, and sometimes even insurance certificates. One wrong character can force a reschedule or a reprint at the worst time.
Lock these inputs first:
-
Name order and spacing exactly as the passport shows it
-
Passport number with correct letter case if applicable
-
Issue and expiry dates
-
Place of issue as printed, not what you assume it means
Then catch the errors that show up only when systems talk to each other.
Common Failure Patterns
-
Dropping a middle name in the form, then using it on an employer letter
-
Writing a shortened address in the form, then submitting a bank statement with a longer address format
-
Entering an old passport in travel history, then forgetting to include it in the supporting file where required
If you have multiple passports, keep the timeline clean. Many applicants travel on a new passport but have visas in an old one. Several systems ask about prior passports. If you list prior travel that occurred under an old passport, keep a note of which passport held the relevant entry stamps or visas.
If you recently renewed a passport close to submission, watch your “issue date” logic. Some visa forms use the issue date as a verification point. That date must align with the passport scan you submit, not with the date you applied for renewal.
Photo And Identity Inputs: Used Earlier Than People Think
Photos seem simple, but they can disrupt the timeline fast. Some applications block submission if the photo fails, and some appointment centers reject photos on the day, forcing you into last-minute retakes.
You want a photo workflow that avoids surprises:
-
Use a compliant photo early enough that you can redo it without shifting your slot.
-
Keep the same photo version for form upload and printed submission if the process uses both.
Identity inputs go beyond the photo. They include your document scans, signatures, and sometimes identity numbers that must match supporting documents.
Watch for “format traps”:
-
If a system requires a signature on a specific page, sign that page, not a separate blank area.
-
If you upload a passport scan, keep the page flat, complete, and readable at full zoom.
For some routes, the appointment center staff checks scan quality before acceptance. If your passport MRZ line is blurred, staff may rescan. That can affect your timeline if the center is crowded and you miss your slot window.
A practical check is the “three-zoom test” before upload:
-
Can you read the passport number at 100% zoom?
-
Can you read the issue and expiry dates at 150% zoom?
-
Can you read the MRZ line at 200% zoom?
If any answer is no, redo the scan. Do not wait for the appointment day to find out.
Travel History And Employment Fields That Trigger Follow-Ups
Certain answers predict extra scrutiny. It does not mean your application is weak. It means your answers are easier to question, so you need to make them internally consistent.
Travel History Triggers
-
Many short trips in a short period, especially across multiple regions
-
A long stay abroad that looks close to the maximum allowed
-
Gaps where travel history seems incomplete compared to your passport stamps
-
Declaring “no travel” when your passport shows multiple visas
Your goal is alignment, not perfection. If your travel history is long, keep it accurate and structured. Use consistent date formats. Do not round dates unless the form requires month-only entries.
Employment fields are even more sensitive because they connect to money and ties.
Employment Triggers
-
Recent job change shortly before the application
-
Self-employment without clear documentation anchors
-
Income figures that do not match the statement pattern
-
Multiple roles with overlapping dates
Handle job titles carefully. A UK visitor application may ask for job title and duties. A Schengen submission may include an employer letter that lists a slightly different title. Pick one title that matches your contract and payslip, then use it everywhere.
If your employer uses an internal title that differs from your public-facing role, choose the title that appears on formal documents. Then use the cover letter later to clarify the real-world function if needed. Do not create two parallel titles across the form and letters.
If you are self-employed, treat “business name” like a legal identifier. Do not alternate between a trade name and a registered name across the form and bank statements.
Payment And Appointment Confirmations: The Quiet Documents You’ll Need Later
Payment receipts and appointment confirmations feel administrative, but they often become problem-solvers.
You may need them when:
-
You reschedule an appointment, and the system asks for a reference number
-
A center claims you are not on the list, and you need proof of booking
-
A fee is marked unpaid due to a processing delay
-
You need to match the submission date to a document date that a reviewer questions
Create a “proof of process” mini-file right after you pay and book:
-
Confirmation page screenshot
-
Email confirmation saved as PDF
-
Receipt showing amount and date
-
Reference number captured in a notes file
Then keep the details consistent with your application identity. Some systems display a slightly modified name format. If the confirmation shows a truncated middle name, do not panic. But ensure your passport number and appointment details match exactly.
Also, check the appointment location and service type. Some applicants book a biometrics slot but select the wrong category, then discover it at the counter. That can force a rebooking and shift your entire document freshness window.
Before you leave the booking screen, verify:
-
Service type matches your visa route
-
Location is correct
-
Date and time are correct in local time
-
The reference number is saved in two places
Once the form is locked and the booking trail is safe, your next move is building the proof set that actually carries the decision, starting with finances, employment evidence, and the documents that establish credibility.
Core Proof Stage: The Documents That Decide Credibility

Now you move from “did we fill the form correctly” to “does the story hold up under scrutiny.” Here, we focus on the documents that officers actually lean on when they decide whether your plan is believable and low-risk.
Financial Proof: How It’s Actually Read (And What It’s Compared Against)
A visa officer rarely reads your bank statement like an accountant. They read it like a risk analyst. They look for patterns that match the life you described in your form.
They compare your money story against three things:
-
Your employment story (role, salary, stability)
-
Your travel story (trip length, destination cost, who pays)
-
Your behavior story (regularity, sudden changes, unexplained spikes)
Start with a practical workflow that mirrors how files get reviewed.
Step 1: Choose The Right Statement Window
Pick a period that shows normal activity and covers a recent time close to submission. For many visitor and short-stay routes, a multi-month view is common, but the key is continuity, not volume.
Use this test:
-
Does the statement period include your most recent salary credit or income cycle?
-
Does it show a consistent balance trend, not a one-week snapshot?
-
Does it avoid a “dead period” where nothing happens, then a sudden jump right before submission?
Step 2: Label The Big Movements Before They Get Questioned
Large deposits are not automatically bad. Unexplained ones are.
If you have a large deposit, prepare a matching proof trail:
-
Sale of an asset: sale agreement and bank entry
-
Refund: refund notice and bank entry
-
Bonus: employer confirmation and payslip line item
-
Family support: sponsor letter and sponsor bank evidence if relevant
Keep the explanation tight. A Schengen officer does not want a personal story. They want a clean link between the deposit and a legitimate source.
Step 3: Make Your Declared Income Match Your Evidence
A UK Standard Visitor form often asks for your monthly income. A Canadian TRV may ask what you earn and what you spend. If you declare an amount, your statement and payslips must support it.
Common mismatch patterns:
-
Declaring “monthly income” as gross salary, but the statement shows net salary
-
Declaring income in one currency, while the statement shows another, without clarity
-
Mixing business revenue with personal salary without separating the narrative
If you are self-employed, the officer looks for “usable money,” not just turnover. Show how income moves into personal access in a consistent way.
Step 4: Prove You Can Pay Without Looking Like You Drained Your Account
Officers often assess whether your trip cost would empty your account. If your statement shows a modest balance and you propose a long multi-country itinerary, that tension creates questions.
Align your trip design with what your finances can reasonably support. A two-week Spain and France itinerary looks different from a four-week multi-entry Schengen plan with expensive internal flights.
Employment Or Business Proof: Make It Easy To Verify
Employment proof is rarely about “having a job.” It is about whether your job connects to stable life patterns and a credible return.
A strong employment set does three things:
-
Confirms your role and salary in plain terms
-
Confirms approved leave dates that match your travel dates
-
Confirms continuity, meaning you are expected back
For many Schengen submissions, the employer letter is a core anchor. For the UK, the letter often gets read alongside bank statements. For the US, the officer may ask verbally, and your paperwork must back up what you say.
Use an employer letter checklist that prioritizes verification.
Employer Letter Checklist
-
Company letterhead and full contact details
-
Your full name as per passport
-
Your job title and start date
-
Salary structure, if relevant to your bank credits
-
Approved leave dates match your trip dates
-
Confirmation that you will resume work after the leave
-
Signatory name and position that can be verified
Then run a verification realism check. Ask: if a caseworker calls this company, does the contact line reach a real office, not a dead number?
For self-employed applicants, the verification target changes. Officers want to see that your business is real and ongoing.
Build a business-proof package that looks “checkable”:
-
Business registration certificate
-
Tax filings relevant to your region
-
Business bank statements, if you use them
-
Invoices or contracts that show ongoing activity
-
A short business cover note that explains how your income flows
Avoid mixing unrelated proofs. A self-employed package with random screenshots and social media posts often confuses. Choose documents that an officer can recognize quickly.
Ties To Home: Where Weak Packets Get Weak Fast
“Ties” are not a separate document type. They are an illogical outcome. Your evidence should make it easier for an officer to conclude you will return.
Different routes emphasize ties differently. A UK Standard Visitor assessment often looks at motivation and compliance. A Schengen file often looks at return plausibility and purpose coherence. A US visitor interview can be direct, and vague answers hurt.
Focus on ties that match your situation, not generic “proof of ties.”
Strong tie evidence usually falls into these buckets:
-
Work or study continuity: employer letter, enrollment confirmation, future term dates
-
Family responsibilities: dependent documents where relevant, clear, and limited
-
Financial anchors: recurring commitments, stable income patterns, long-term obligations
-
Legal status anchors: residency permits or visas that show a stable base in a country
Do not overload the packet. A thick bundle can still look weak if it does not connect to your timeline.
A clean way to test ties is the “return date challenge.” Pick your stated return date and ask:
-
What document shows you must be back around that time?
-
What document shows your life resume after that date?
-
What document makes it inconvenient to stay longer than allowed?
If you cannot answer those three questions, you will likely face follow-ups.
Cover Letter And Explanations: Used As A Lens For Everything Else
A cover letter is not an essay. It is a control tool. It directs attention to the strongest parts of your file and pre-empts predictable doubts.
Use a cover letter when:
-
Your trip plan looks expensive relative to your balance trend
-
You have a recent job change, but strong continuity proof
-
You have a large deposit that is legitimate, but could be misread
-
You are visiting family and need to clarify who pays and where you stay
Keep it short and structured. Officers do not reward long narratives.
A useful cover letter structure looks like this:
-
Purpose and dates: one clear sentence that matches the form
-
Funding: who pays and which documents show it
-
Employment and return: what anchors you to return, with references to proof
-
Any unusual item: one paragraph that resolves it, such as a large deposit or a gap
Avoid claims that you cannot prove. Do not say “we have strong ties” and then provide nothing that shows it. Do not add new dates or cities that are not present elsewhere.
For a US B-1/B-2 interview, you may not submit a cover letter in the same way as a Schengen packet, but the same logic applies. Your “spoken cover letter” must match your evidence. If you say you are traveling for 10 days and your documents suggest 20, the gap becomes the story.
Translations, Notarization, And Attestation: How To Avoid “Formally Correct, Practically Useless”
Formal compliance can still fail if the document becomes unreadable or loses identifiers.
Translations must preserve:
-
Names exactly as on the original
-
Dates in a clear format
-
Official stamps and their meaning
-
Reference numbers were present
-
Currency and balances without rounding
A common mistake is translating content but omitting the header or stamp block that proves authenticity. Another is translating a bank statement and accidentally changing the account holder's name format. That creates a mismatch with your passport name.
Notarization and attestation rules vary. Some documents need it, others do not. The trap is spending time notarizing a document that was never required, then missing the real formatting requirement.
Use a practical document handling rule:
-
If a document will be compared to another document, prioritize consistency and readability over decorative certification.
-
If a document will be validated for authenticity, then follow the exact certification rules for that route.
When you have mixed-language documents, keep your packet easy to scan. Place the translation directly behind the original. Label them clearly in your file order so the reviewer sees them as a pair.
Once your credibility proofs are stable and consistent, the next stage is where your itinerary becomes evidence, and where flight timing starts getting judged as part of your overall story.
Travel Plan Proof Stage: When Your Itinerary Becomes Evidence
At this stage, your “plan” stops being a plan and starts acting like evidence in a Schengen Type C file, a Japan tourist application, or a UK Standard Visitor review. When dates and locations look coherent, the rest of your packet reads calmer.
When Flight Reservations Are Reviewed—and What They’re Looking For
In a Schengen Type C application, flight details often get reviewed as a timing and routing sanity check against your leave dates and insurance period. In a Japanese temporary visitor file, flight timing can be compared to your day-by-day schedule and your stated return obligations.
Embassies and consulates tend to scan for coherence, not bargains. A Spanish Schengen reviewer looks for entries and exits that match your declared length of stay. A French Schengen reviewer may compare the first entry point to your stated main destination logic.
Here is what usually gets judged, even when nobody says it out loud:
-
Trip Length Logic: Your Schengen stay length should match the days implied by entry and exit in your itinerary.
-
Routing Logic: A London to Paris to Rome loop can look normal for a Schengen plan, but a zigzag that adds unnecessary backtracking can look improvised to a case officer.
-
Connection Plausibility: For a Canada TRV review, unrealistic connection times can raise questions about whether the plan was assembled carelessly.
-
Return Alignment: For a UK Standard Visitor file, a return date that clashes with your work schedule can trigger “why this date” scrutiny.
Use a flight reservation checklist that is built for visa comparison, not for travel hacking:
-
Passenger name matches passport spelling and order.
-
Origin and destination match the visa jurisdiction story (entry point vs main stay logic for Schengen).
-
Travel dates match the form and match your leave approval dates.
-
Trip length matches your stated duration in letters and schedules.
-
Any open-jaw routing is explained by your itinerary (for example, arriving in Milan and departing from Paris in a multi-country Schengen plan).
Timing matters as much as content in a Schengen or Japan packet. If you generate flight proof too early, the dates can drift by the time you submit, and the drift becomes the story. If you generate flight proof too late, a rushed route can conflict with your leave letter or your insurance start date.
If your appointment date moves, treat the flight proof like a versioned document in a Schengen workflow. If you reschedule a biometrics slot for the UK, update only what the new timeline forces you to update, and keep the narrative stable. If a consulate asks for updated flight proof after submission, provide the updated document with the same purpose statement and the same trip length logic.
Accommodation, Invitations, And “Where You’ll Be” Proof—Used Differently By Different Officers
In a Schengen Type C file, accommodation proof often functions as a night-by-night credibility check, even when the officer is not reading every hotel line. In a Japan visitor application, accommodation details often support the rhythm of your schedule of stay, including city transitions and plausible daily pacing.
Different routes use “where you’ll be” proof in different ways. For a UK Standard Visitor case, accommodation proof can be optional, but if you submit it, it can still be compared against your stated purpose and trip duration. For a Canada TRV visit to family, a host invitation can become a central anchor, and the host details can get cross-checked against your declared relationship and trip plan.
Build accommodation proof the way a Schengen case officer scans it:
-
One clear lodging plan per night, with no overlapping stays
-
City sequence that matches your transport and flight routing
-
A consistent address format that matches what you typed in the form
-
A plan that matches your budget story (a luxury stay across four cities can clash with modest balances)
If you are mixing hotels and staying with a host in a Schengen plan, keep the transitions clean. If your Italy Schengen itinerary has five nights in Rome, then two nights with a friend in Florence, list that shift clearly and support it with a host letter that matches the dates. If your visit to France includes a host stay that requires a formal host document in that jurisdiction, make sure the host proof aligns with the exact address and the exact dates you claim.
Invitation letters behave differently from hotel proofs in many visa systems. In a UK family visit case, an invitation letter often needs to answer practical questions like address, relationship, and who pays, and the letter must match your stated length of stay. In a Canadian TRV family visit case, the host's proof often works best when it matches the applicant’s dates and includes the host’s status proof without adding irrelevant details.
Use an invitation letter consistency check that mirrors how a consular officer thinks:
-
Host name and address match the accommodation plan you submitted
-
Relationship matches what you entered in the form
-
Dates match your flight plan and your stated duration
-
Financial responsibility is clear and supported by whichever side is paying
If your accommodation plan changes after a Schengen submission, treat it like a controlled edit. If you change cities, you may change the logic of your itinerary, and that logic is what the embassy will compare to your purpose and your funds. If you only change a hotel within the same city for the same dates, you are usually changing logistics, not narrative, and that is easier to explain if a consulate requests an update.
Insurance Documents: Often Ignored Until They Suddenly Aren’t
In a Schengen Type C application, travel medical insurance is not a “nice to have,” and the dates become a comparison point against your entry and exit. In a Schengen packet, an insurance certificate that starts after your stated entry date can create an avoidable mismatch, even if every other document is strong.
Treat insurance as a timeline document, not a checkbox. For a Schengen application, align the policy dates to cover the full intended stay that your flight plan implies. For a multi-country Schengen itinerary, ensure the coverage statement clearly applies across the Schengen area for the full travel period you claim.
Insurance mistakes often come from mid-process edits. If you adjust your Schengen flight dates by a few days after booking a new appointment, the insurance dates must shift with the same logic. If you extend a UK trip for personal reasons, you may not need Schengen-style insurance, but you still need internal consistency between your dates, your leave letter, and any documents you provided that show coverage periods.
Use a simple insurance alignment check tied to the Schengen review flow:
-
The policy start date is on or before the Schengen entry date you claim
-
Policy end date is on or after the Schengen exit date you claim
-
The traveler's name matches the passport spelling
-
The destination coverage statement matches the region you are entering
If you are using a multi-trip policy for frequent travel, be careful with how it reads in a Schengen file. A multi-trip policy can be acceptable, but the officer still needs to see coverage that clearly includes the specific travel window you claim. If the certificate is vague, attach a policy schedule page that shows active coverage during the exact dates implied by your itinerary.
Keeping Flexibility Without Looking Vague
Many travelers want flexibility, but a visa file rewards clarity. A US B-1/B-2 traveler may have flexible city plans, but the consular logic still expects consistent dates and purpose. A Schengen Type C packet can allow city changes later, but the application stage needs a coherent first version.
We keep flexibility by choosing what stays fixed. For a Schengen itinerary, fix your entry and exit dates, your main destination, and your trip length. For a Japan tourist plan, fix your arrival and departure and keep your city sequence plausible, even if you keep day activities light.
Here is a practical way to structure a flexible plan that still reads credible in a Schengen review:
-
Lock anchor dates: entry date, exit date, and total days
-
Lock anchor locations: the main country and the primary city or region
-
Keep movable pieces small: hotel swap within the same city, minor day trips, internal transport timing
A UK Standard Visitor file often benefits from a similar approach. If you are visiting family in Manchester, keep your stay dates stable and your host address stable, and avoid rewriting the trip into a multi-city tour after you have already submitted host evidence.
If you expect changes, prepare a “clean update path” that does not rewrite your story. If a Schengen consulate requests updated itinerary evidence, provide a revised set where only the necessary elements changed, and keep your purpose statement and total trip length consistent. If a Canada TRV caseworker asks for clarification, answer the question directly and avoid adding new cities or new dates that were not previously mentioned.
If you need flight reservation proof that stays easy to update during an appointment shift in a Schengen timeline, BookForVisa.com provides instantly verifiable reservations, a PNR with PDF, unlimited date changes, transparent pricing ($15 ~₹1,300), worldwide visa use trust, and credit card payments.
The convenience of specialized online services becomes clear when you need to finalize your itinerary evidence. One of the biggest advantages for modern applicants is the ability to book dummy ticket online for visa risk-free PDF PNR through specialized platforms built for this exact purpose. This online booking convenience means you receive your complete, verifiable reservation instantly via email or download, complete with a real-looking PNR and all necessary flight details in a polished PDF format. These services emphasize top-tier security with encrypted payments and deliver documents that fully comply with various embassy requirements for proof of onward or return travel. The instant delivery feature is particularly helpful when your appointment date shifts or when you need to quickly update your file to match new timelines. No more waiting days for confirmations or dealing with unreliable methods—everything is handled professionally and transparently. This method not only saves valuable time but also ensures your itinerary evidence integrates seamlessly with the rest of your application, from financial proofs to employment letters. For anyone navigating complex visa rules, having this reliable option available makes the process far less daunting. Discover the ease of online dummy ticket services by visiting our article on book flight reservation online for visa risk-free PDF PNR and experience how it can support a smoother submission.
Submission Day: What Gets Used At The Counter Vs What Gets Used Later
Submission day is not the moment your visa gets decided, but it is the moment your file gets “locked” into the system. What happens at the counter determines what the decision-maker will actually see later.
The VAC Hand-Off Reality: Order, Scanning, And What Staff Actually Check
For many Schengen countries, you submit through a VAC, and the staff member’s job is operational. They check basic completeness, scan documents, and package your file for onward processing. They are not the consular officer.
That distinction matters because two different people “use” your documents:
-
VAC staff use documents to confirm you meet intake rules and can be processed.
-
Case officers use documents to assess credibility, consistency, and eligibility.
So you should build your submission packet to survive scanning and later comparison.
Start with a scanning-first approach.
What Scanning Changes
-
Fine print becomes unreadable if the original is low contrast.
-
Light stamps can disappear in grayscale.
-
Multiple pages can get merged in the wrong order if you do not label cleanly.
-
Folded or stapled pages can create missing corners and clipped names.
Before you go to a Schengen appointment, do a “scan stress test” at home:
-
Print your key documents and scan them with a basic scanner or phone scanner app.
-
Check the readability of names, dates, and account numbers at 150% zoom.
-
Make sure every page has a visible identity hook, like your name or a reference number, especially for bank statements and employer letters.
Then think about file order as a practical defense. If the case officer sees your employer letter before your bank statement, they interpret your funds through the lens of your job stability. If they see random travel proofs first, they may evaluate your trip logic before they understand your financial basis.
A clean Schengen packet order that works well in scanning environments often looks like this:
-
Application form and appointment confirmation
-
Passport copy and prior visas
-
Employment or business proof
-
Financial proof
-
Insurance proof
-
Flight reservation proof and itinerary
-
Accommodation proof or host proof
-
Cover letter only if it resolves a specific issue
If your VAC has a required order, follow it. If it does not, keep your order consistent with how documents get judged.
Do not overwhelm the intake desk. Many applicants bring three versions of the same bank statement or multiple insurance certificates. That can create scanning mistakes. Pick one clean set and keep backups in your bag, not in the packet.
Biometrics And Identity Confirmation: The “No Drama” Documents
Biometrics day is where small identity mismatches become big delays. This is where the staff is strict because the system is strict.
You want “no drama” documentation. That means:
-
Your passport is in good condition and readable.
-
Your appointment confirmation details match your passport details.
-
Your name is consistent across core documents.
If you have a name that appears in different formats across documents, handle it with clarity, not improvisation. For example, some banks show initials while passports show full names. You cannot rewrite the bank record, but you can avoid introducing a third format in your cover letter or form.
Bring a tight identity carry set that supports quick matching:
-
Passport and any required copies
-
Appointment confirmation
-
Payment receipt, if applicable
-
A printed application summary if the process provides one
For Schengen submissions, some centers capture fingerprints and photos and also validate key fields. If the staff member sees a mismatch and cannot reconcile it quickly, they may flag it. That can lead to a pause while you fix the issue.
Also, watch your document condition. If your passport bio page has a crease through the MRZ line, the scanner may struggle. That can waste time and cause unnecessary stress at the counter.
Interview Path Vs No-Interview Path: Different Moments, Different Risks
Some visa routes are interview-heavy, like many US nonimmigrant categories. Others are mostly document-driven, like many Schengen tourist applications. The document timeline changes depending on whether you will face questions live.
If you have an interview, the risk shifts from “what the officer reads” to “what you can explain without changing your story.”
Here is how to prepare your documents for an interview-based flow like a US B-1/B-2:
-
Carry only documents you can explain in one or two sentences.
-
Keep your trip purpose and dates aligned with your DS-160 entries.
-
Do not introduce new trip details at the window that are not reflected in your written record.
In no-interview flows, your written narrative carries more weight. For a Schengen Type C file submitted through a VAC, your cover letter and supporting documents may be the only voice you have.
That changes what matters on submission day:
-
Clarity of scan quality matters more.
-
Internal consistency matters more.
-
“Loose ends,” like unexplained deposits or mismatched dates, get punished faster because nobody can ask you a quick question.
If you know your route is no-interview, make your file answer questions before they are asked. If your flight reservation implies a 14-day trip, make sure your leave letter and insurance also imply 14 days, not 12 or 16.
What If A Document Is Missing Or “Not Acceptable Today”
This is where people panic and create avoidable problems. A missing or “not acceptable” document at the counter can usually be fixed, but how you respond matters.
First, recognize two common situations:
Situation 1: The Document Exists, But The Format Is Wrong
Examples:
-
Your bank statement is a screenshot, and the center requires a stamped statement or a downloadable PDF.
-
Your employer's letter lacks a signature.
-
Your flight reservation proof does not show the passenger's name clearly.
In this situation, do not invent a replacement on the spot. Ask what format is acceptable and whether you can submit an updated version within the allowed window.
Use a calm response script:
-
Confirm what is missing in one sentence.
-
Ask if the center accepts same-day email submission or return-within-hours submission.
-
Ask if they will proceed with the rest of the intake while you fix that one item.
Situation 2: The Document Is Missing Completely
Examples:
-
You forgot the insurance certificate for a Schengen file.
-
You did not print the appointment confirmation.
-
You left your old passport at home, which contains previous visas you referenced.
Here, your goal is to avoid a rushed substitution that changes your story. If you must bring a missing item later, bring the exact item that was missing, not a new version that introduces new dates or new travel plans.
If the center allows a later submission, keep the “later” document consistent with what you already handed in. If you hand in a bank statement set today and later bring a new letter that changes your job title, you create a mismatch that can follow your file.
Also consider the risk of partial submission. For a Schengen application, a partial packet can cause delays because the case officer may not open the file until it is complete. It is often better to fix the missing item quickly than to push through an incomplete intake.
Handling Tight Scanning Windows Without Rebuilding Your File
If your biometrics appointment is handled through a center in Mumbai, the most common pressure point is time. Lines can be long, scanning can be strict, and staff may not have time to negotiate document formatting.
We keep it simple:
-
Bring one clean printed packet in the likely scanning order.
-
Bring a backup digital set on your phone and email, so you can resend a PDF quickly if requested.
-
Keep your “fixable” items ready, like an employer letter reprint or an updated statement download.
The key is not the city. The key is that some centers operate with tight windows, and your file should be built to pass intake without on-the-spot improvisation.
If you walk out with a submission receipt, treat it like a core document. It can matter later if the embassy requests a missing page or if you need to prove what was submitted and when.
Once your file is accepted and scanned, the next stage is what happens after submission, when verifications and additional document requests start shaping the outcome.
After Submission: Verification, Cross-Checks, And Additional Document Requests
After you submit, your job shifts from building the file to protecting it from avoidable contradictions. Here, we focus on what gets verified behind the scenes and how to respond when the embassy asks for more.
What Happens In The Quiet Period (And Why Your Phone Might Ring)
In many visa systems, silence does not mean nothing is happening. It often means your file is moving through internal checks that you will never see.
For a Schengen Type C application, the consulate may review the scanned packet and cross-check the basics before making a decision. For a UK Standard Visitor application, automated checks and caseworker review can happen in stages. For a Canada TRV, reviews can trigger verification steps if parts of the story look inconsistent.
Your phone might ring because someone is trying to verify a detail quickly. Or your employer might get an email. Or nothing happens at all, but the file is still being evaluated.
Treat this period as “do not change the story” time.
Practical actions that help:
-
Make sure your employer and any sponsor know they may receive a verification call.
-
Keep your bank account stable and avoid unusual movements that conflict with your submitted narrative.
-
Keep the same trip dates and purpose across any communication you send if asked.
If you submitted flight reservation proof, assume it can be referenced later. Even if an officer does not “verify” a reservation, they can still compare the dates and routing to other documents. That comparison is a form of verification.
Also, be reachable. A missed call does not always hurt you, but it can delay the file. If a consulate is trying to confirm an employer letter detail, a quick confirmation may prevent an additional document request.
The Most Common Cross-Checks That Catch People Off Guard
Cross-checks are usually simple comparisons across your own documents. They catch people because the mismatch is small and easy to miss during preparation.
Here are the cross-checks that appear often in tourist and visitor workflows:
Dates Compared Against Other Dates
-
Flight entry date vs insurance start date in a Schengen file
-
Flight exit date vs leave approval end date for a UK visitor
-
Trip length in the form vs trip length implied by flight dates
A classic problem is a one-day shift. You adjust the flight dates to fit a new appointment slot, but you forget to adjust the leave letter dates. The officer sees two versions of your timeline and has no reason to assume the best one is true.
Employment Details Compared Against Money
-
Salary amount in your employer letter vs net salary credits in your bank statement
-
Job start date in the form vs payslip history
-
Business income claims vs business account activity if you submitted it
This is why we avoid “rounded” numbers. If your salary varies, declare what is true and support it with documents that show variability.
Identity Details Compared Across Systems
-
Name formatting across the form, passport scan, and bank statement
-
Address formatting across the form and supporting documents
-
Passport number in booking receipts or confirmations
Even a small inconsistency can create friction. If your bank statement shows your name with initials but your employer letter shows your full name, that can still be fine. The issue starts when a third format appears in your cover letter or application form.
Trip Logic Compared Against Financial Logic
-
A complex multi-city Schengen plan compared to modest balances
-
A long stay compared to a short leave approval
-
A premium travel plan compared to a simple income story
Officers often look for proportionality. Your trip does not need to be cheap. It needs to be plausible for your finances and time off.
If you want a quick self-check during the quiet period, run the “three-way match” test:
-
Flight dates match your form dates
-
Flight dates match your insurance dates if Schengen
-
Flight dates match your leave or obligation dates
If any mismatch exists, do not send unsolicited updates. Wait for an instruction or request, then correct with a controlled explanation.
Additional Document Requests: How To Respond Without Changing Your Story
An additional document request is not always a bad sign. It often means the officer wants one missing link, not a complete rewrite.
But your response can create problems if you treat the request like an opportunity to overhaul your file.
Start by reading the request as a specific question. Most requests fall into one of these buckets:
-
Clarify a number: explain a deposit, confirm income, show more statement pages
-
Clarify a relationship: host proof, sponsor proof, family relationship documents
-
Clarify a timeline: updated leave letter, updated travel dates, updated insurance
-
Clarify authenticity: more official versions, stamped versions, or original scans
Then respond with a tight package that answers the question and nothing else.
A good response structure looks like this:
-
A short note that repeats the requested item and confirms what you are providing
-
The exact document(s) requested, clearly labeled
-
One optional supporting document that directly proves the same point
Avoid adding new cities, new dates, or new purpose statements unless the request specifically asks you to. If the request asks for “updated bank statements,” do not also update your itinerary unless the trip dates have genuinely changed and you can keep the overall narrative consistent.
If the request asks for updated flight reservation proof, treat it as a date alignment exercise. Keep:
-
The same passenger name format
-
The same general routing logic
-
The same trip length unless you have a strong reason to change it
If the officer asks for clarification, they are already comparing versions. Do not create extra versions.
A useful internal rule is one change per request. If the consulate asked for one missing piece, do not introduce two new variables.
When To Refresh Documents (And When Refreshing Makes You Look Worse)
Refreshing is useful when the file has genuinely aged. It is risky when it looks like you are rewriting history.
For Schengen, “freshness” can matter for bank statements, employer letters, and sometimes insurance certificates if the dates no longer match what is implied. For UK and Canada workflows, updated statements may be requested if processing runs longer than expected.
Refresh only when one of these conditions is true:
-
The officer asked for an update.
-
The document is now outside the “recent” window, and you can replace it without changing your story.
-
The document was incorrect, and you must correct it to restore consistency.
Refreshing can look worse when it creates a new story. Here are examples of harmful refreshes:
-
You submit one set of flight dates, then provide a new set with a different trip length without any explanation.
-
You refresh an employer letter, and the job title changes, even though your role has not changed.
-
You replace a bank statement with a different account that changes your funding story.
If you need to refresh a document, keep the core narrative stable and show continuity. For example, if you refresh bank statements, keep the same account and show the next period, not a totally different account with a different pattern.
If you refresh flight reservations due to a forced schedule change, keep the same purpose and keep the same travel window logic. A one-day shift that aligns with a new appointment is easy to explain. A complete re-route across different countries is harder.
If Your Plans Change During Visa Processing Times
Plans change. The key is separating changes that affect the visa story from changes that are just logistics.
In a Schengen file, changes that affect the visa story include:
-
Changing the main destination country
-
Changing the total trip length materially
-
Changing the entry or exit dates in a way that conflicts with insurance and leave proof
Changes that are usually just logistics:
-
Changing a hotel within the same city for the same dates
-
Minor flight time changes that keep the same travel days
-
Small internal transport adjustments that do not change the overall itinerary sequence
If your plan change is purely logistical, do not volunteer updates unless asked. If your plan change affects the core story, wait for guidance or a request, and be prepared to provide updated proof that preserves consistency.
If you must communicate a change, keep the message strict:
-
State what changed
-
State what did not change
-
Attach only documents that reflect the change
Example: if your Schengen entry date is moved by two days due to an appointment delay, you update your flight dates and insurance dates. You do not rewrite your employment letter unless the leave dates also need updating.
After this stage, the decision arrives, and your documents return for a second life at check-in and at the border, where the “travel day carry set” matters again.
Decision And Travel Day: The Second Time Your Documents Get Used
When the decision comes through, the timeline is not over. Your documents get used again, but now the audience changes to airline staff, transit staff, and border officers, and the questions become more practical for visa applicants and foreign nationals.
The Approval Moment: What To Check Before You Celebrate
A visa approval can still create problems if the issued details do not match what you will present at check-in or at the border. Fixing errors is easier before you fly, especially when visa processing is already done, and you are preparing to travel.
Check the visa outcome as soon as you receive it, especially for short-stay stickers and electronic approvals tied to temporary residence.
Here is what we verify first for a Schengen Type C sticker:
-
Name and passport number match your passport exactly
-
Valid from and valid until dates match your intended entry window
-
Number of entries matches your planned travel pattern
-
Duration of stay matches what you expect for the itinerary you submitted
A common mistake is assuming “valid until” equals “days allowed.” They are different concepts in many systems. Your duration of stay controls how many days you can actually remain, even if the validity window is longer.
For electronic authorizations or eVisas, we also check:
-
Passport number and expiry
-
Visa type and purpose category
-
Any conditions or remarks that affect travel
If something is wrong, act immediately. Do not wait for mailing time or assume a courier will fix it later. Airlines rely on strict identity matching. A single-digit error can block check-in.
If your trip plan changed after approval, do not assume the visa covers it without checking the issued conditions. A single-entry Schengen visa issued for the dates you stated is usually not the time to improvise a new entry date outside that window.
What To Carry Even If It Was Already Submitted
Embassies decide based on a file. Travel day works differently. Airline staff and border officers often want quick confirmation that you can enter, stay, and leave lawfully, even after applications lodged have moved past the visa application centre.
We treat this as your carry set. It is not the full packet. It is the small group of documents that support the same story you already submitted as a complete application.
For a Schengen Type C trip, a practical carry set often includes:
-
Passport with a visa sticker
-
Travel medical insurance certificate that covers your travel dates
-
Proof of accommodation or host address for your first night
-
Proof of funds that is quick to show, such as a recent statement summary or bank app access
-
Flight details that show your return or onward travel plan
For a UK Standard Visitor, a carry set often includes:
-
Passport and visa, if required for your nationality
-
Return or onward travel details
-
Host address and contact details if visiting someone, including a family member
-
A short employment proof, such as a leave confirmation,n if your trip length is tight
For a US visitor entry, border questions can be quick and direct. Your carry set supports clean answers that help the officer process applications without confusion:
-
Where are you staying?
-
How long are you staying?
-
Who is paying?
-
When are you leaving?
Do not carry an overstuffed folder that is impossible to navigate at a counter. Carry fewer pages, but make them readable.
Use the 30-second rule. If you cannot locate the right page in 30 seconds, you will look unprepared, even if your documents are correct.
A simple organization method works well:
-
One small folder for identity and entry documents
-
One folder for trip logistics, including flight and accommodation
-
One folder for financial and employment proof, only the essentials
Also, keep digital backups. Airports are harsh environments for paper. A spilled drink or rain can ruin a printed set. Save PDFs on your phone and in an email draft you can access.
Airline Check-In: When Your Logistics Evidence Reappears
Airlines are responsible for carrying passengers who are allowed to enter. That is why check-in agents sometimes ask for proof that you assumed was only for the embassy, especially for foreigners and foreign nationals on short stays.
What airlines commonly check depends on the route:
-
Visa validity and passport expiry
-
Return or onward travel for destinations that enforce it strongly
-
Transit requirements if you connect through certain hubs
If you are flying to a Schengen country, the airline may check your visa dates and number of entries. If you are flying to the UK, they may check whether you are eligible to travel. If you are flying to a country that requires onward travel proof, they may ask for your exit plan, even if a low-cost airline applies a strict boarding policy.
Flight evidence becomes most important when:
-
Your visa validity window is tight, and your departure date is near the boundary
-
You have a complicated itinerary with multiple connections
-
You are entering on a short-stay permission, and your stay length is close to the maximum
We keep check-ins smooth by aligning three items:
-
Passport and visa details
-
Flight dates and destination
-
Any required insurance coverage dates for that route
If your flight is delayed and you are rebooked, keep the revised flight confirmation. Sometimes rebooking changes the travel day but not the travel window. If the new schedule shifts your arrival to a different date, make sure it still sits inside your visa’s validity window.
If you have a single-entry Schengen visa and you exit the Schengen area during the trip, a re-entry can fail. Airlines may flag this before you board. Your flight plan should match your visa entries.
Keeping Check-In Smooth Across A Connection
If you are departing from Delhi with a connection through Doha on the way to Europe, you may face document checks at the first check-in desk, not in transit. Plan in advance so you do not lose time at the counter.
The practical move is to keep your carry set ready at the first airport:
-
A passport with the correct visa
-
Flight details showing your onward and return
-
Schengen insurance certificate covering the full travel window
-
First accommodation address for the Schengen entry point
In transit, staff often focus on boarding and timing, but the first airport check-in is where eligibility gets confirmed.
If You’re Refused Or Delayed: How The Document Timeline Changes Next Time
Refusals and delays feel personal, but they are usually documentary. They point to a gap in credibility, consistency, or eligibility proof, and the timeframe to fix them can vary based on the route and the visa application centre workflow.
If you are refused for a Schengen Type C, the refusal reason often maps to a specific document weakness:
-
Purpose not credible: itinerary logic or supporting context did not match the stated reason
-
Doubts about return: ties and obligations were not strong or not clear
-
Insufficient means: funds did not match the trip length and expected costs
-
Inconsistent information: dates, titles, addresses, or travel history conflicted
If you are delayed due to an additional document request, your next timeline should assume that requests can happen again. Build buffers into your document freshness windows.
When reapplying, we keep a strict rule: fix the exact weakness, then rebuild the timeline around it. This is how you turn feedback into a stronger file that can qualify on the next attempt.
Here is a practical reapplication workflow:
-
Collect the refusal or request letter and map each point to the document that must be improved
-
Update the anchor documents first, such as employment proof and finances
-
Rebuild trip logic, including flight and accommodation proofs, only after the credibility base is stronger
-
Keep the new application internally consistent with what you can prove now, not what you hoped to prove earlier
Avoid cosmetic changes that do not address the reason. A new itinerary with different cities will not fix a weak funding story. A new bank statement will not fix a job continuity gap if your employment proof is still unclear.
If the issue was inconsistency, rebuild from the form stage. Many second attempts fail because applicants patch one document but leave the original mismatch elsewhere, and then the officer may refer to the earlier record for further information.
Once you have travel day covered, the final piece is closing the loop so your document timeline is easy to repeat for future visas without starting from scratch.
As your visa application nears completion and you look ahead to travel, paying close attention to every detail in your documentation ensures the best possible outcome. Embassy-approved dummy tickets provide one of the most reliable forms of onward travel proof, demonstrating to officers that you have a clear plan to depart after your authorized stay. These professionally crafted documents help reinforce the credibility of your entire application by showing thoughtful planning and genuine temporary intentions. When selecting your proof documents, focus on those that include verifiable PNR details, accurate passenger information, and realistic routing that matches your stated itinerary. This consistency strengthens your case significantly, particularly when combined with strong home ties and financial evidence. Reliable dummy tickets act as risk-free yet convincing support for your visa application proof requirements. For a complete understanding of best practices, it's worth reviewing what makes these documents effective. Taking the time to use high-quality, embassy-compliant options can make the difference between smooth approval and additional requests. To learn more about the role these play in successful applications, read our in-depth explanation on what is a dummy ticket and why do embassies require it. With proper preparation using these resources, you can approach your visa process with greater assurance and increase your chances of a positive decision.
Keep Your Schengen File Consistent From Appointment To Boarding
A Schengen Type C decision often comes down to whether your dates, funds, and flight plan stay consistent from the visa application centre scan to the consulate review. We built this timeline so you can submit a complete application, track progress with respect to what officers compare, and avoid avoidable mismatches in Rome, Paris, or any other main-destination file.
Processing times and visa processing times vary based on the consulate, working days, and mailing time for delivery, so check the website for current processing times and processing times listed, without expecting a guarantee or three working days. If you are applying for permanent residence or dealing with a case tied to the people’s republic, the same discipline helps: keep every document aligned for each person, spouse, and parent, and respond fast if they request further information.
More Resources
Why Travelers Trust BookForVisa.com
BookForVisa.com has been helping travelers since 2019 with specialized dummy ticket reservations for visa applications. We've supported over 50,000+ visa applicants worldwide, providing verifiable PNRs and instant PDF deliveries. Our 24/7 customer support ensures quick resolutions, while secure online payments and unlimited changes demonstrate our commitment to reliability. As a registered business with a dedicated team, BookForVisa.com focuses exclusively on flight reservations for visa, offering niche expertise you can count on.
About the Author
Visa Expert Team — With over 10 years of combined experience in travel documentation and visa assistance, our editorial team specializes in creating verifiable flight and hotel itineraries for visa applications. We have supported travelers across 50+ countries by aligning documentation with embassy and immigration standards.
Editorial Standards & Experience
Our content is based on real-world visa application cases, airline reservation systems (GDS), and ongoing monitoring of embassy and consular documentation requirements. Articles are reviewed and updated regularly to reflect current practices.
Trusted & Official References
- U.S. Department of State — Visa Information
- International Air Transport Association (IATA)
Important Disclaimer
While our flight and hotel reservations are created to meet common embassy requirements, acceptance is not guaranteed and may vary by country, nationality, or consulate. Applicants should always verify documentation rules with the relevant embassy or official government website prior to submission.
Related posts

How to Book a Flight for a Visa Application
18 Jul, 26
Is a Flight Reservation Enough for a Schengen Visa From India?
18 Jul, 26
Do All Schengen Countries Require a Return Flight?
18 Jul, 26
How Do You Plan a 15-Day Schengen Visa Itinerary?
18 Jul, 26
Which Flight Itinerary Template Fits Your Visa Trip?
18 Jul, 26
Can You Change Travel Dates After Applying for a Visa?
18 Jul, 26
When Should You Book Flights for a Visa Application?
18 Jul, 26
Can You Reserve a Hotel Without Paying Upfront?
18 Jul, 26
Direct or Connecting Flight for a Visa Application?
18 Jul, 26