Short answer: A mixed-surname family flight reservation for a visa should identify each traveler exactly as the carrier requires from that person’s passport, then align the route and dates with each individual application. Different family names are not a defect by themselves. Build a person-by-person sheet linking booking references, passport names, relationship evidence and any child-consent documents required for the actual route.
A visa file for four relatives may show Carter, Bennett and Harper across one proposed journey. Different surnames are not inherently suspicious. The useful question is whether each applicant can be identified, each relationship that matters can be documented, and the flight plan agrees with the individual forms and supporting papers.
This guide builds one reconciliation sheet for a mixed-surname family: passenger names from passports, the actual reservation record or records, each person’s visa application, and the relationship or consent evidence relevant to any minor. It also covers practical airline name-entry and correction issues without confusing a reservation with an issued ticket.
Use the four-person examples as hypothetical models. Follow the destination authority’s current checklist and the operating airline’s name-entry rules. If you need a flight reservation, choose one that accurately reflects every traveler, route and date; no booking format guarantees a visa decision or boarding.
Key facts
- Keep the traveler’s passport name separate from the booker’s or payer’s name.
- One booking reference can simplify coordination but does not prove ticketing or a family relationship.
- Check airline-specific punctuation, long-name and single-name conventions before submission.
- A minor’s relationship or consent evidence depends on who travels and destination rules.
- Compare every applicant’s form, reservation, passport, lodging and travel dates before filing.
In This Guide
- Why a Mixed-Surname Visa File Needs a Person-by-Person Check
- One Family Route, Multiple Applicants: Reconcile Each Record
- Passport Names Across Four Visa Applications: Build a Reconciliation Sheet
- Hyphens, Apostrophes, and Double-Barreled Surnames in the Booking Form
- One-Letter and Single-Name Passports: Escalate Before Booking
- Booker, Payer and Traveler: Keep the Roles Separate
- Name Error on One Family Record: Correct the Affected Passenger
- Child Relationship and Consent Evidence in a Mixed-Surname File
- At the Airport: Verify Every Family Member and Keep Documents Together
- Four-Person Mixed-Surname Visa File: Final Reconciliation
Official-source check: The Government of Canada’s guidance for minors gives different document advice for a child traveling alone, with one parent, or with another adult; it does not make notarization universal. UK Border Force says it may ask questions where an adult is not a parent or has a different family name. These examples support checking the exact destination rule; they do not imply that mixed surnames alone invalidate a family booking.
Reviewed for: four-person booking-to-application reconciliation, name-field exceptions, minor relationship evidence, and country-specific consent rules.
Why a Mixed-Surname Visa File Needs a Person-by-Person Check
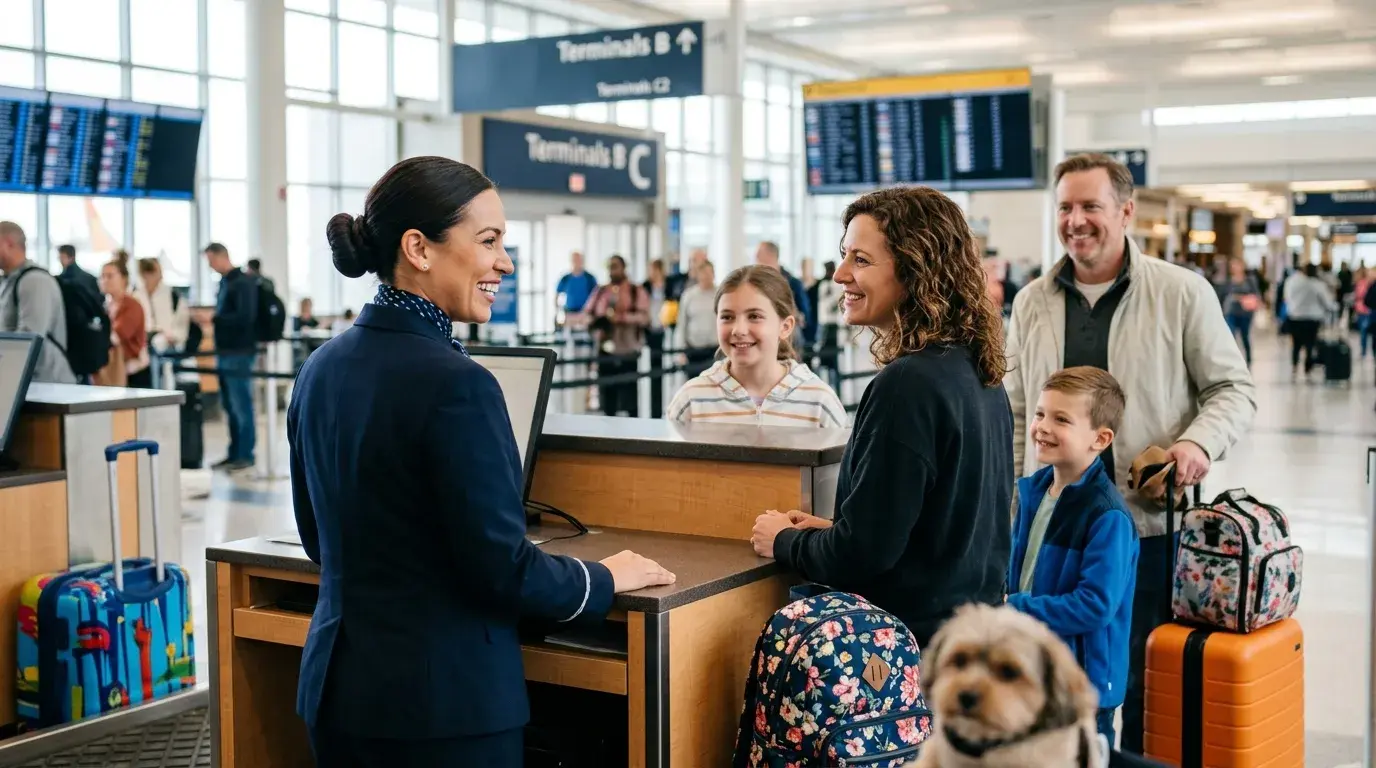
Your family does not need one shared last name for a reservation to look credible. What counts is that every name on the itinerary lines up with the papers each person will carry. Here is how that plays out on a real route.
Mixed Last Names Are Everyday Travel
It's common for families with differing last names to travel together on the same flight. A mother keeps her maiden name. A stepfather has his own. A child carries a surname from an earlier marriage. Agents see these combinations all day long.
We will follow one household through this guide. Emma Carter travels with her husband Lucas Bennett, her daughter Olivia Harper, and Lucas's mother Margaret Bennett. They plan to fly from Delhi to Toronto, and all four need an itinerary for their visa files.
That is four people, three surnames, and one trip. Nothing about it is unusual.
What Airlines Do and Do Not Ask For
Different surnames do not automatically prove or disprove a relationship. Airline booking, visa evidence and a child’s border documents serve different purposes. Check the carrier’s passenger data requirements and the receiving authority’s checklist separately.
The booking name should correspond to the travel document used by that passenger. Airlines can apply their own formatting conventions for spaces, accents and middle names, so compare the issued record with the passport and ask the issuer to resolve material discrepancies before travel.
A surname difference between relatives is a separate question from a name mismatch within one person’s documents. Address both, but do not change anyone’s legal name merely to make the family look uniform.
Even a small gap can slow a check-in. Keep that in mind for every field you fill in later.
When Embassy Officers Look Closer
An embassy reads an itinerary differently from a gate agent. The officer wants to see a coherent family trip that fits the application. Different surnames are fine when the paperwork tells one consistent story.
Before you submit, confirm these points:
- Each traveler’s booking name matches the corresponding application and passport under the issuer’s convention.
- Travel dates and routes are consistent, or any real difference is explained.
- All booking references are assigned to the correct passenger and segment.
A single family record may make the shared route easier to read, but separate legitimate records can also be explained. List every booking reference and connect each passenger to the corresponding application.
Consistency helps reviewers compare the family’s forms, sponsorship and itinerary. It cannot prevent questions or establish any relationship by itself.
Domestic Versus International: Reading the Document Rules for Your Route
Domestic and international document rules differ by country, carrier and traveler. Check each segment, including infant-document rules, with the operator and relevant border authority.
In the hypothetical Delhi–Toronto family, one traveler might use a domestic identity document on the first leg and a passport internationally. Verify the actual documents accepted on each segment before booking.
Read the rules for each sector before you start the booking. Airlines publish them, and so do the border authorities of your destination.
For a minor, the required relationship and permission evidence depends on the destination, custody facts and who accompanies the child. A shared flight reservation alone does not establish parental authority or consent.
Common Worries About Mixed Surnames, Answered Plainly
A different family surname may prompt a question in some circumstances, particularly where a child travels with one adult. Carry the documents that establish the true relationship or permission under the destination’s rules.
A mixed-surname booking is common, but a visa reviewer may still need to understand how applicants relate. Make the connection factual and easy to document without implying that a shared surname is required.
Ticket-to-passport matching and child-travel permission are separate checks. Prepare for both, rather than assuming one will replace the other.
A few quick tips keep the worry small:
- Copy each traveler’s name from the accepted travel document.
- Use one record where practical, but document separate records honestly.
- Check the destination’s relationship and consent rules for minors.
You may discover that the hardest part is not the surname at all. It is the habit of typing a name from memory. Break that habit, and most of the risk disappears.
Airline name-entry, check-in and family-seating terms can differ. Read the operating carrier’s instructions and ask about an unusual name before confirmation.
Reading Your Own Household Before You Book
Take ten minutes to list every traveler and the exact document each will use. Write down the surname on that document, not the one the person uses socially. A wife who goes by her husband's name in daily life may still hold a passport in her maiden name.
This short audit catches the quiet mismatches. Emma Carter might sign emails as Emma Bennett, yet her passport says Carter. The reservation must say Carter.
Build a simple table in your notes:
-
Traveler name as printed on the passport
-
Document number and expiry date
-
Relationship to the lead booker
-
Which sector, domestic or international, the person will fly
Once that list is correct, the form becomes a copying job rather than a guessing game. You are also ready for the next step, which is deciding how to put all four people on one reservation without friction.
One Family Route, Multiple Applicants: Reconcile Each Record
A shared last name is not what holds a group booking together. A shared record is. This section shows how to build that record so your mixed-surname family travels as a unit on paper and in the air.
Why One Passenger Name Record Beats Four Separate Bookings
One reservation record may list multiple passengers on the same proposed flights. Confirm each traveler’s segment and the record’s status; one PNR does not guarantee all names were ticketed, that later changes apply identically, or that the file proves a relationship.
A carrier can usually book relatives with different surnames together. Its system checks passenger data according to its own rules, so inspect every name rather than assuming the group relationship is encoded.
Separate booking records can complicate coordination but are not inherently invalid. Record which traveler and segment belongs to which reference and ask the airline what, if anything, it can associate.
A shared record can make itinerary management simpler; seat placement and disruption handling remain subject to availability and airline policy.
Adding Each Traveler Without Forcing a Shared Surname
Enter each passenger from that person’s passport or other accepted travel document. In this hypothetical family, Emma Carter, Lucas Bennett, Olivia Harper and Margaret Bennett keep their own names; copying one surname onto all four records would create an error.
Many forms pre-fill the second passenger from the first. That helps couples who share a name, but it can quietly overwrite the correct name for a stepchild. Review each block before you move on.
Watch these items for every person:
-
The title menu, if the form insists on one
-
The date of birth, which also decides adult, child, or infant pricing
-
The gender field, which must agree with the passport
-
The contact details for the lead passenger only
Passenger categories, infant arrangements and age thresholds vary by airline and fare. Enter each real date of birth accurately, check whether an infant needs an individual seat or document, and verify the operating carrier’s policy.
How a Single Reservation Improves Seat Assignments and Itinerary Control
One record helps the airline identify the group, but it does not automatically seat everyone together. Select or request seats under the carrier’s policy, especially where a child must sit near a responsible adult.
Separate records may need an explicit request to associate travelers. Ask the carrier how it handles family seating rather than assuming separation is unavoidable.
Selecting seats in advance helps avoid separation of family members with different surnames. Do it right after you finish the booking, while rows are open.
One record also simplifies the itinerary view. You see every flight, every time, and every traveler in a single place. When the embassy asks for an updated copy, you download one document instead of four.
Choosing Flights That Suit Grandparents and Young Children
Choose a connection using the actual terminal, baggage, mobility and child-travel needs. A fixed ninety-minute or four-hour rule cannot describe every airport or ticket combination.
Look at connection length. A connection under ninety minutes is risky when you carry documents for a child and move at the pace of an older traveler. A connection over four hours is tiring but safer.
Check the arrival time against your visa dates and your host's schedule. A late-night landing in Toronto may leave the family with limited transport options. An earlier arrival gives time for entry checks.
Choose one route for everyone. Splitting the family across two routes to save a little money adds complexity, and the savings rarely justify the extra paperwork. A shared route also gives the embassy one clear story to read.
Adding a Late Traveler or Splitting the Group After Booking
A later-joining relative may require a separate booking. Ask the issuer whether the person can be added or whether the records can be associated without implying a single ticket or protected connection. Keep the visa file’s family timeline current.
If that happens, contact the airline right away. Ask whether the new passenger can be linked to the same record or noted in the file as traveling with the family. Agents can sometimes add a remark, and that remark helps with seating.
Think about flight bookings in two layers. The first layer is the core group on one record. The second layer is any later additions. Keep a list that shows which tickets booked sit on which reference, so nobody has to guess.
When you split a group on purpose, say a child flying ahead with a grandparent, create the separate record at the beginning of planning, not at the end. Match the dates, the route, and the seat requests across both records.
Never change a surname to make two booking records look related. Explain the genuine relationship with appropriate evidence and identify separate booking references honestly.
Four-person reconciliation matrix: Create one row per applicant: passport name and number; visa-form name; reservation reference and segment dates; relationship to any minor; consent or custody evidence where the destination requires it; and the document owner responsible for corrections. Mark a difference only after checking the actual issuer or authority rule. This matrix explains the group without forcing every surname to match.
Keeping the Embassy Copy Consistent for the Whole Family
Where a visa checklist accepts a flight reservation, confirm what the issuer actually provides, how long the record remains valid, and how changes are handled. A PNR or PDF is not proof that a fare is paid, a seat is issued, or the authority will accept the document. For the wider reservation-versus-ticket choice, see the BookForVisa flight-reservation guide; this article focuses on a multi-applicant mixed-surname file.
Whatever route you choose, print or save the same final version for every application. Do not let one family member submit an older draft with a different departure time.
Label the file clearly, such as "Family Itinerary Delhi Toronto," and share it with every adult in the group. If anything changes, replace the file everywhere on the same day. A short note in your shared folder saying which version is current saves a lot of confusion later.
With the record built and consistent, the real precision work begins. Each traveler's name has to be typed into the form in exactly the right way.
Passport Names Across Four Visa Applications: Build a Reconciliation Sheet
Names are where most family itineraries go wrong. The rule is simple, but it demands attention to each character. Treat the form like a copying exercise, not a writing exercise.
Start With the Machine Readable Zone
Open each passport to the data page. At the bottom, you will see two lines of capital letters, numbers, and arrows. That strip is the machine-readable zone, and airport scanners read it first.
The strip shows the surname, then the given names, separated by double arrow marks. It removes spaces, accents, and some punctuation. It is a quick way to see how a system will interpret the full name.
Use the passport data page as the starting point and compare the machine-readable zone where useful. If a system transliterates or abbreviates the name differently, ask the operating airline or issuer which form it requires rather than choosing a version by guesswork.
For adults who fly on a government photo ID on domestic routes, the same rule holds. Copy the name as the card prints it, with the spelling on that card and no changes.
Matching the First Name Field and Last Name Field
The form gives you a first name field and a last name field, and sometimes a separate box for middle names. Put the surname in the last name field only. Put the given name in the first name field, and the rest in the middle slot.
Lucas Bennett goes in as Lucas in the first name field and Bennett in the last name field. Olivia Harper goes in as Olivia and Harper. Do not reverse them because the child's surname came from a different parent.
Some cultures write the family name first. If the passport prints the family name under "Surname," that is the last name field, even if the person uses it first at home.
Do not place a complete name into the wrong field simply to pass the form. If the interface cannot represent a traveler’s name, contact the issuer before confirmation; airline conventions vary.
Middle Names and Given Name Order
The question of middle names causes the most doubt. The safe approach is to follow the passport. If the passport lists the given name as "Margaret Anne," enter Margaret in the first slot and Anne in the middle slot, or both together if the form has no middle box.
Middle-name display and acceptance rules vary by carrier and route. Compare the confirmation with the passport and ask the issuer about any omitted or reordered given name that could matter.
Keep these points in mind:
-
Include every given name from the passport when the form has room.
-
Do not add a nickname, even if it appears on credit cards or emails.
-
Do not drop a given name because it feels long.
-
Keep the order of given names the same as the passport.
For multiple given names, enter the full name when the booking system allows it. If there is a field limit, use the operating carrier’s documented convention or obtain issuer guidance before substituting initials.
Long or Compound Names: Ask About the Actual Field Limit
There is no single 59-character limit that applies to every airline booking system. Check the relevant carrier or agent’s name-field limit and approved abbreviation rule before shortening a long name.
Do not shorten any name to initials on your own. Ask the carrier or issuer which characters its system permits and how it represents the full passport name.
The machine-readable zone can help explain transliteration, but the airline’s accepted booking format controls the final entry. Retain written guidance for any unusual shortening.
Hypothetical example: a passenger has five given names and a compound surname. Before abbreviating any field, send the exact passport rendering to the issuer and ask it to confirm the accepted reservation and ticket display.
After typing, read every block back against the passport line by line. Check the spelling of each name, the order of the given names, and the placement of any spaces.
Why the Name on the Ticket Must Stay Exactly as It Appears
A material mismatch between a booking and passport can delay check-in or boarding. Check the carrier’s policy for spelling, order, punctuation and transliteration; “exact match” should not be used to invent a universal zero-tolerance rule for every character.
Consider two spellings: "Katherine" versus "Catherine." Both look right to a human, yet a scanner sees two different people. The airline may allow a fix, but you could lose time or fees.
For an international flight, the passport is the final authority. Do not rely on a visa form, a bank card, or an old ticket as a source of spelling. Only the current travel document counts.
If a traveler recently renewed a passport and the spelling changed, use the new document. Old reservations under the earlier spelling may need correction before you fly.
When every name matches, the day at the airport feels almost easy. You hand over the passport, the agent finds the record, and the family moves on together.
Reading Names Aloud: A Two-Person Check
Eyes skip over small errors, especially after several travelers. A second person reading aloud finds mistakes that silent review misses. Make this a fixed step before every payment.
One adult holds the passports. The other watches the screen. The first reads each name letter by letter, including every given name. The second confirms each letter against the booking page.
Do this for dates of birth too. Read the day, the month, and the year in the same order as the form. A swapped day and month is one of the most common slips, and it can shift an adult into the wrong age band.
If you are alone, record yourself reading the passport and play it back while you check the screen. It feels odd, but the method works. Finish by saving a screenshot of the review page for your records.
Names That Look Different Across Documents
Documents do not always agree. A school card may show a short name, a bank card may show initials, and an old visa may show a different spelling. These conflicts tempt people to pick the version they like best. Resist that.
The passport is the document that airlines and border officers use. Choose its spelling every time. If another document in the family file uses a different version, note the difference and be ready to explain it.
For example, Margaret Bennett's driving licence might list "Margaret A Bennett," while her passport lists "Margaret Anne Bennett." The ticket should read as the passport does. The licence is not wrong, but it is not the source for the trip.
Keep copies of any document that shows a link between name versions, such as a deed poll or a marriage certificate. A single page can answer an officer's question quickly. Store these copies with the travel folder, and tell every adult where the folder lives.
If a spelling differs across two passports in the group, treat each passport as the source for that person only. Never adjust one person's name to match another's. Each traveler stands on a single document.
Building a Pre-Booking Name Sheet
A name sheet gives you one trusted reference. Create it before you open the booking page, and keep it open while you type. It should list each traveler's name in the form's order.
For our Delhi to Toronto family, the sheet might look like this:
-
Emma Carter: first name Emma, last name Carter
-
Lucas Bennett: first name Lucas, last name Bennett
-
Olivia Harper: first name Olivia, last name Harper
-
Margaret Bennett: first name Margaret, last name Bennett
Record each passport number and expiry to catch an avoidable mismatch. Passport-validity requirements vary by destination and traveler; do not assume every trip requires six months beyond arrival.
Then compare the sheet with the form after you finish. A second pair of eyes helps here. Ask another adult in the family to read the names aloud while you look at the screen.
The sheet also becomes your reference if a correction is ever needed. You can show the agent what was meant and what was typed. With names settled, the next problem is punctuation, because hyphens and apostrophes confuse booking systems.
Hyphens, Apostrophes, and Double-Barreled Surnames in the Booking Form
Punctuation looks harmless on a passport. Inside a booking system, it can trigger a rejection or a quiet change. A few simple conversions keep your family on schedule.
Hyphens, Apostrophes and Double Surnames: Match Carrier Conventions
A booking system may convert a hyphen to a space or omit it, but that treatment is carrier-specific. For a surname such as Harper-Wells, confirm the accepted entry with the issuer.
Compare the final display with the passport and the airline’s convention. Do not assume every double surname must use spaces or that a different display is harmless.
Some carriers normalize punctuation, while others may require a specific format. Only the relevant carrier or issuer can confirm how the name should appear on its record.
Avoid guessing whether to join or separate the two surname parts. The machine-readable zone and the carrier’s instructions can help resolve the format.
If the form has no space option, check the airline's help page. Some systems auto-convert when the passenger submits the details, so test with one traveler first.
Special Characters That Make Booking Systems Reject a Name
Booking systems may reject names with special characters. That includes accents, apostrophes, periods, and symbols such as ampersands. A name like "O'Brien" or "Müller" can cause errors in some tools.
Booking systems may remove punctuation or transliterate accented letters, but the acceptable rendering varies. Ask the operating carrier or issuer how it maps a name such as O’Brien or Müller, and compare the final record with the passport rather than applying one universal conversion.
Here is how to decide:
- Compare the passport data page and machine-readable zone.
- Ask the operating carrier how its system handles the exact punctuation or accent.
- Save the issuer’s answer and check the final record.
For relatives with apostrophes or accents, check each passport and each operating carrier’s convention. Consistency matters, but it must not override an individual passenger’s documented name.
Do not invent letters or a different surname. A display that omits punctuation or accents may be a system convention, but confirm it with the issuer when the resulting name is unclear.
Titles and Suffixes: What Stays Out of the Name Fields
Titles should not be typed in name fields unless instructed. Mr, Mrs, Ms, Dr, and similar words belong in the title drop-down. If you type "Dr Daniel" into the first name field, the ticket may print "Dr Daniel Mr," which causes confusion.
Titles and suffixes are handled differently by airline systems. If a suffix appears in a passport name field, ask the issuer how to represent it; do not automatically omit or add it.
If a traveler is a child, pick Miss or Master where the form demands it. If the form offers a neutral option, use it. The choice is not a legal claim about the person. It simply fills a required field.
When a doctor or professional holds a title on the passport, still enter it in the title field only. The name fields stay clean.
If the airline asks for a specific format, follow its instructions. The "unless instructed" rule matters here. A form that says "Enter title with name" leaves you free to comply.
A Worked Example With Four Different Name Styles
Let us test the rules with our household. Emma Carter has a plain name. Lucas Bennett has a plain name. Olivia Harper carries a plain surname, and Margaret Bennett shares Lucas's surname. Now add a twist. Suppose Olivia's surname were Harper-Wells.
For Olivia, the form takes Olivia in the first name field and "Harper Wells" in the last name field. There is no hyphen, no title in the name fields, and no suffix. A child receives a title from the menu only if the form requires one.
Now suppose a grandfather, Daniel O'Connor, joins the group. His entry becomes "Daniel" and "OConnor" or "O Connor," following the machine-readable zone. The key is to apply the same logic to every traveler and to keep a note of what you chose.
Next, imagine that Emma holds a passport with two given names, Emma Louise. The form accepts Emma in the first slot and Louise in the middle slot. If the form has no middle box, enter both given names together.
The test of success is the review page. Every name should read cleanly, in the right box, with no stray characters. If something looks odd, fix it before payment, while changes cost nothing.
A Quick Test Before You Press Submit
Before you submit, read each block of names aloud. Compare the sound and the spelling against the passport, and check that nobody has a title inside a name field. This one-minute habit catches most errors.
Then look at the review page. Some systems show the names exactly as they will print. If the review page differs from your entry, fix it there rather than after payment.
Print the page or save it as a file. Keep it with the family's documents. If a mismatch ever surfaces, you will have proof of what you entered and when.
Some travelers have an even tougher puzzle, with names that do not fit the usual two-field mold. Those cases come next.
One-Letter and Single-Name Passports: Escalate Before Booking
Not every traveler fits the neat first-and-last pattern. Some surnames are a single character, and some passports carry only one name. Forms demand two fields, so you need a clear method.
Repeating a Single-Letter Surname in the Last Name Field
Do not repeat a one-letter surname merely because a form rejects it. The workaround depends on the carrier and system. Ask the issuer to document the approved entry and verify the resulting reservation before using it in a visa file.
There is no universal requirement to repeat a one-letter surname. Follow the carrier’s documented procedure and obtain an accurate final confirmation.
If the airline uses a special rendering, keep the issuer’s explanation with the booking and ensure any visa evidence does not invent a different identity.
Hypothetical example: Clara Q joins the group. Ask the carrier how it accepts the one-letter surname Q rather than entering Q Q or QQ without instruction.
Do not invent “NA” or “None” as a legal surname. A system may require a placeholder, but only the carrier or issuer can tell you which convention its record supports.
Single Name Passports and the Unknown Given Name Problem
Some passports carry a single name. People from certain regions hold documents that print only one word. The booking form still wants two fields, so you need a workable pattern.
Some airline systems use a placeholder for a single-name passport; others use a repeated name or a dedicated option. Ask the operating carrier which method it accepts before entering either.
A single-name passport needs carrier-specific handling. The airline’s staff will not necessarily infer the correct name from an improvised booking. Obtain the approved field entry before payment or reservation issuance.
Where a form offers a single name option, choose it. If not, contact the airline before you pay. A short call or message can save a lot of trouble later.
A visa and airline record may use different display conventions. Follow each issuing authority’s instructions and carry an explanation where a difference needs clarification.
Why Placeholders Backfire on Real Reservations
When a name field refuses an entry, people sometimes reach for a placeholder. They type "NA," "XXX," or a made-up word to move forward. On a reservation meant for real travel, this creates a ticket that matches no passport.
A placeholder name can only be fixed through a correction or a new ticket. That costs time and sometimes money, and it can push a family past a visa deadline. The right move is to stop and ask the airline how it wants the name entered.
The same logic applies to guessed spellings. If a handwritten passport entry is hard to read, ask the traveler or check the machine-readable zone. Never guess.
Treat every field as a statement of identity. When the statement is accurate, nothing needs fixing later.
Children With Short or Unusual Names
Children's passports follow the same rules as adults' passports. A child with a short name, a single name, or a very long name gets no special treatment in the booking form. The passport remains the guide.
Short names can cause the same trouble as single-letter surnames. If a child's surname has two letters, check whether the form accepts it. Most do. If not, ask the airline before you pay.
Book an infant using the infant’s own required travel document details and the carrier’s age and seating rules. Do not copy an adult’s surname unless it is genuinely the infant’s documented name.
Add the infant's date of birth carefully. The airline may ask for proof of age at the airport, so carry the birth certificate. A mismatch between the date entered and the date on the document can lead to extra checks.
When a child has a single name, treat the case as you would for an adult. Enter the name the way the airline instructs, and keep a record of the exact format you used. That record will save you if a correction is ever needed.
Checking the Result Before You Pay
After you enter an unusual name, look at how the review page prints it. Zoom in on every character. Compare it with the passport page, and ask someone else to check.
If the printed result looks odd, stop. Odd output is a signal that the system parsed the name in a way you did not intend. A short chat with support is better than a correction later.
It also helps to book the unusual traveler first. If the system accepts that name, add the others. If it fails, you have not yet committed the rest of the family.
Here are a few warning signs to watch for:
-
The surname appears in the first name slot on the review page.
-
The system adds a title you did not choose.
-
A single letter is shown with a dot or a gap.
-
The total length shows a truncated name.
Resolve each of these before payment. Once the group is set, a different question appears, which is about who is allowed to book and pay for these tickets.
Booker, Payer and Traveler: Keep the Roles Separate
Families often split the work. One parent handles the research, a grandparent pays, and a relative abroad sends a sponsor letter. The rules around booking and payment are flexible, but the ticket itself is strict.
Anyone Can Book a Flight for Another Traveler
A parent, sponsor or agent can often make a booking for another traveler, subject to the airline and payment provider’s conditions. The passenger field must still identify the person who will travel, not the person arranging the trip.
What matters is accurate data. The booker needs each traveler's exact name, date of birth, and passport details. Without them, the booking will carry errors that surface at the airport.
Ask each adult to send a clear photo of the data page. Do not rely on memory or on messages that contain typos. A photo removes the risk of a swapped letter.
The booker also needs a way to reach the group. Enter a contact email and a phone number that someone will actually check. Airlines send schedule changes to that address, and a missed message can ruin a visa timeline.
If the booker is not traveling, the confirmation still goes to the booker's inbox. Forward it to every adult right away so each person holds a copy.
Payment Can Come From Anyone, Not Just the Traveler
A third party may be able to pay, but payment verification, fraud checks and refund rules differ. Check the carrier’s terms and keep the payer’s evidence separate from the passenger’s identity evidence.
Some airlines run a fraud check when the cardholder name differs from the passenger names. If that happens, expect a request for a copy of the card or a short verification step. Have the cardholder ready to respond.
Here is what usually helps:
-
Use a card that is in the booker's name and has international payments enabled.
-
Keep the cardholder's phone nearby for one-time passcodes.
-
Save the receipt, because embassies sometimes ask who funded the trip.
-
Keep the amount and currency consistent across receipts.
For a visa file, a clear payment trail can strengthen the application. A sponsor's name on the receipt explains who covers the cost, and the sponsor letter can say the same.
If the reservation is a verifiable placeholder for the embassy and not a paid fare, the payment question is simpler. The fee is small, and the document is what you submit.
Why the Ticket Belongs Only to the Named Traveler
The ticket is non-transferable and valid only for the named traveler. Margaret cannot hand her ticket to Olivia, and Olivia cannot use it in place of Emma's. The airline ties each ticket to one identity.
This rule shapes how you think about payment too. Paying for a ticket does not give you the seat. It gives you the right to ask for changes or refunds on behalf of the traveler, within the airline's rules.
Airline tickets are usually nontransferable to another passenger. The correction, cancellation or replacement options depend on the carrier, fare and record status; ask the issuer before assuming a new ticket is mandatory.
For a family of four, this matters when plans change. Suppose Margaret falls ill the week before departure. Her ticket cannot move to a cousin. You would cancel Margaret's seat and book the cousin separately.
Always match the ticket to the traveler's legal name and the document that proves the person's identity. Do not treat names as interchangeable, even among close relatives.
Refunds and Who Receives Them
Refunds follow the payment, not the passenger. If a grandmother pays by card, any refund returns to that card. This surprises families who assumed the traveler would receive it. Agree on this point before you book.
Write down the amount paid for each ticket. If one traveler cancels, you can then see what should come back. Airlines show a per-passenger breakdown in the confirmation, so keep that page.
If the family arranged for one person to cover the group, share the receipt with every adult. A clear record avoids awkward conversations later and supports the visa file when an officer asks who funded the trip.
When a refund is delayed, quote the booking reference and the ticket numbers when you contact the airline. Specific numbers speed up the search and reduce the back-and-forth.
Sponsors, Employers, and Third Party Bookers
A sponsor may arrange travel for a family. Record who pays and what the visa checklist asks the sponsor to document, but keep each traveler’s booking name and application identity distinct.
The sponsor needs the same data a family member would need: exact names, dates of birth, and passport numbers. Send the data through a secure channel. Avoid casual chat threads for passport photos where you can.
Ask the sponsor to forward the confirmation promptly and compare it with the person-by-person sheet. A 24-hour free cancellation or correction period is not universal; read the actual booking conditions.
If the sponsor also writes a letter for the embassy, make sure the names in the letter match the itinerary. A sponsor who writes "Emma Bennett" while the ticket says "Emma Carter" creates an unnecessary question.
Finally, agree who will contact the airline if a change arises. Give that person the booking reference and the passenger details. A clear owner prevents duplicated calls and conflicting instructions, and it keeps one voice on every thread.
Keeping Records of Who Did What
When different people book, pay, and travel, a short record prevents mix-ups. Create a one-page summary with three columns: booker, payer, and traveler. Store it with the reservation.
For example, Lucas books all four tickets, Margaret pays by card, and Emma, Lucas, Olivia, and Margaret travel. The summary shows each role at a glance.
Share the summary with the embassy if it asks about financial responsibility. It keeps your story consistent and easy to follow.
Even with perfect records, human error can happen, and one slip in a name is the most common. The next section explains how to repair it without losing the trip.
Name Error on One Family Record: Correct the Affected Passenger
A typing error should be addressed as soon as it is found. The available remedy and cost depend on the operating airline, issuing agent, fare and time before departure.
Minor Spelling Fixes Depend on the Operating Airline
There is no universal two- or three-character correction allowance. Some carriers permit certain typo fixes, while others require reissue or charge a fee. Identify the precise error and ask the issuer for the rule on this booking.
A small spelling error may be correctable before departure, but the method and deadline vary. Contact the ticketing issuer promptly and retain the updated confirmation; do not hand-edit the airline PDF.
Examples of fixes in this range:
- A transposed letter, omitted letter or other difference may need an issuer correction.
- Do not treat a one-letter surname or particular character count as automatically eligible.
When you spot an error, gather the booking reference and the relevant passport-name details, then use the issuer’s official correction channel. Share identity documents only through its approved secure process.
Many airlines ask for a scan of the passport. Send a clear, uncropped image, because partial images slow the process.
When the Error Is Bigger: Full Name Change and Replacement
A larger mismatch can be treated differently from a small typo. Ask whether the issuer can correct or reissue the record, and what proof and fees it requires.
A larger change may require a reissue or a new booking, but that is not automatic. Ask the issuer about correction eligibility, fare differences, fees and any effect on the other family members.
Check the actual cancellation or grace-period terms before cancelling. Free 24-hour cancellation is not a universal right for all routes, carriers, agencies or reservation types.
Cancellation and replacement costs vary by fare and timing. Compare the actual refund conditions with the correction option before discarding a booking.
When you replace a ticket, keep the new reference number and update every document that mentions the old one. This includes sponsor letters, itineraries in visa files, and any hotel or tour records.
If the family has an old and new reference, identify which is current on any document supplied to the visa authority. Follow its process for replacing a submitted itinerary.
Cancel and Rebook Versus Correct in Place
You will face a choice between correcting the existing ticket and starting over. The better option depends on the size of the error, the fare rules, and the time left.
An in-place correction may retain a booking reference, but it can also trigger a ticket reissue, fee or fare difference. Verify the new passenger data and the status of all segments afterward.
A cancel-and-rebook route suits larger errors, but it needs a fresh check of price and seats. Compare the cost of the correction fee against the cost of a new fare.
Run through these questions:
- What correction or reissue does this carrier permit for this name?
- What fee, fare difference or deadline applies?
- Will the revised record still show every family member and segment correctly?
If any answer is unclear, ask the airline. A direct reply in writing is worth more than a guess. Keep the message thread, because it can support your case if a disagreement arises at the airport.
Do not wait until check-in to raise the mistake. Airports are a poor place to negotiate a correction, and agents there may not have the authority.
A Timeline for Fixing a Name Before Departure
Time shapes your options. Think in four windows:
- Immediately after booking: compare each passenger with the passport and ask for any correction.
- Before visa submission: provide the current issuer document, not an outdated reference.
- Before check-in closes: re-verify every passenger and segment; do not leave a known error until the airport.
Set reminders for each window. On the day of booking, verify the confirmation. A week later, review it again. Two days before departure, check the documents you will carry.
If a visa appointment depends on the itinerary, plan the correction around it. Submitting an itinerary with a wrong name and correcting the ticket afterward leaves the file with a mismatch. Fix first, then submit the corrected version.
Keep the issuer’s written correction confirmation. Confirm that its booking system now shows the right passenger data; a letter about a requested correction is not a substitute for an updated record.
How Mismatches Lead to Denied Boarding
A name discrepancy can lead to denied boarding if it fails the carrier’s document check. Only the operating carrier or authorized issuer can decide or fix the record under its rules; do not rely on a gate-level exception.
The risk is greatest on an international flight, because airlines face fines when they carry passengers with improper documents. They treat mismatches seriously for that reason.
Suppose Olivia's ticket reads "Olivia Harpar." The agent sees a spelling gap, checks the rules, and may call for a correction. If the delay runs past the cutoff, the whole family could miss the flight.
Prevent this by checking tickets against passports as soon as the confirmation arrives. Do it again two days before departure. If a gap appears, request the fix at once.
A family that catches errors early rarely meets this problem. The next topic is what to carry for the children whose surnames differ from a parent's, because documents also carry weight.
Child Relationship and Consent Evidence in a Mixed-Surname File
A reservation can be flawless and still leave you stranded at a border desk without the right papers. Surname gaps between parent and child are common, and officers have seen them before. Preparation turns a potential question into a short check.
Relationship Documents for International Trips With Children
A minor’s relationship or travel-authorization documents may be requested for safety and immigration reasons, depending on the route and accompanying adults. This is separate from the airline booking format.
A birth certificate may help link a child to a parent with another surname. Use the actual legal documents for the relationship, which may instead involve adoption, guardianship, custody or a name change. If the narrower issue is a child and parent with different surnames on a dummy ticket, that guide covers the booking document; this page checks the whole family visa evidence set.
Add supporting papers where they apply:
-
A marriage certificate, when a stepparent travels with the child
-
A court order or adoption record
-
A name change deed, if a parent has changed the surname
-
A signed consent letter from the absent parent
Carry originals plus copies. Keep the originals in a safe folder, and keep copies in a separate bag. If one gets lost, the other still works.
Check the rules of the destination country. Some governments publish exact requirements for minors. Canada, for example, advises travelers to carry proof when they cross with children who are not their own.
Do this early. Collecting a certified copy can take weeks, and visa timing is already tight.
Father, Mother, and Legal Guardian: Who Needs What
The child’s documents depend on destination rules, custody and who travels. A child accompanied by one parent may need relationship and authorization evidence, but do not assume the same set applies to every country.
Hypothetical example: a father travels alone with his daughter while the other parent remains home. Canada advises carrying the child’s passport, birth-certificate copy and a signed authorization letter from the non-traveling parent. Another destination may require different wording, translation or certification.
A legal guardian or other adult should check the destination’s current rules for authority-to-travel evidence. Do not assume every journey requires identical letters, court papers or identity copies.
In the hypothetical Carter–Bennett–Harper family, Emma travels with Olivia and Lucas is a step-parent. Identify the actual legal relationship and custody facts; check the destination’s rules for any consent, birth, adoption or court documents before preparing a letter.
Where a consent letter is relevant, identify the child, accompanying adult, dates, destination and reachable parent or guardian as the applicable authority instructs. Avoid placing unnecessary private identifiers in a public example.
There is no universal consent-letter format or notarization rule. For Canada, some authorization letters do not need certification; other destinations may impose more formal requirements. Follow the authority for the exact trip.
Presenting Documents at Entry Without Delay
At the airport and again at entry, officers may ask questions. They might ask who the child is, who the adults are, and where the family will stay. Calm, direct answers help.
Keep documents in one folder, sorted by person. Place the passport on top, then the visa, then the supporting papers. When an officer asks for something, you can hand it over in seconds.
Teach older children to say their own name and the names of the adults traveling with them. Do not coach them beyond what is true. Simple honesty is the best preparation.
Answer questions truthfully and have the relevant documents accessible. The duration or depth of a border check cannot be predicted.
A reservation with all four names may help show a common proposed route, but relationship and permission still come from the appropriate legal documents.
Translations and Certified Copies
Translation and certification rules vary by receiving authority. Check whether an original, copy, certified translation or legalization is actually requested before ordering extra paperwork.
If certified copies are required, obtain them from an accepted source. A stamp does not make an otherwise irrelevant document decisive, and a digital scan may not replace an original.
Some authorities or airlines specify a consent-letter date or validity window. Check the current rule for the journey and update the evidence if custody or travel dates have changed.
Store digital scans in a secure cloud folder and on a phone. A scan will not replace an original, but it helps the airline and the embassy find the record if the physical folder goes missing.
Label each page with the traveler's name and the document type. A tidy bundle speaks well of the family, and it shortens every check. Officers appreciate a folder they can read in a minute.
Updating Papers After a Name Change in the Family
Families change. A mother may remarry, a child may adopt a stepparent's surname, or a parent may change a name after divorce. Each change needs documents that show the link between old and new names.
If a parent's name changed, carry the deed or the marriage certificate that explains it. If a child's name changed, carry the court order or the revised birth record.
Make sure the ticket follows the passport, not the other way around. If the passport still carries the old name, book under the old name. If the passport has been updated, book under the new one.
If a passport renewal is pending, check when the replacement will arrive and whether the booking or visa record must be updated. Avoid relying on a previous name or document number without confirming the authority’s process.
With papers sorted, the only step left is the day itself, when the family moves through the airport and onto the plane. That is where careful preparation pays off.
At the Airport: Verify Every Family Member and Keep Documents Together
The airport is where all earlier work shows its value. If the names match and the record is shared, the process feels routine. Small habits at check-in and at the gate make it smoother still.
Checking In Together at Home or at the Counter
Online check-in can be convenient for a family, but the available time, document checks and boarding-pass issuance vary by carrier and route. Confirm each passenger separately.
Check the operating carrier’s check-in opening and closing times instead of assuming a universal one-day window.
If using a counter, bring each traveler’s required documents and all booking references. Staff may process the group together where the system permits it.
Expect these steps at the counter:
-
The agent scans each passport.
-
The system compares the name on the ticket with the machine-readable zone.
-
The agent asks about baggage and issues a boarding pass for each person.
-
The agent may ask to see a visa for the destination.
Do not assume a spelling discrepancy can be fixed at the counter. Contact the issuer before travel and verify the updated record.
Choosing Seats Early So Nobody Gets Separated
Selecting seats in advance helps avoid separation of family members with different surnames. Seat maps on the airline website let you choose rows for the group. Pick a block of four, or two pairs across an aisle.
If the airline charges for seat selection, weigh the cost against the stress of being split. Many parents of young children consider it worth the fee.
Put Olivia next to Emma, and keep Margaret within easy reach of Lucas. Place the youngest child away from the aisle, and keep an adult on the aisle side.
If adjacent seats are unavailable, ask the airline early how it seats a child with a responsible adult. A shared PNR helps identify the request but does not guarantee a particular row; separate bookings can sometimes be linked or noted.
Request help early. Last-minute changes at the gate are harder, because the plane may be full and the options narrow.
Last Checks Before You Reach the Plane
Before you walk to the gate, do a final review. Open each boarding pass and compare the printed name with the passport. Look at the flight number, the date, and the gate.
At security, keep passports and boarding passes in hand. Agents may ask to see them more than once. Keep the folder of family documents in a bag you can reach.
At the gate, listen for family boarding announcements. Many airlines call families with small children first. Join the line as a group and have all boarding passes ready.
If an agent asks to confirm a name, answer with the passport name, not a nickname. Say it clearly and spell it if needed.
Check that no one has left a document at security or in a restroom. A quick head count and document count at the gate takes thirty seconds and prevents the worst surprises.
Handling Delays and Rebooking Without Splitting the Family
During disruption, the airline’s rebooking obligations depend on the tickets, carriers and applicable passenger-rights rules. One reference can help staff find the group, but it does not guarantee that all relatives will be rebooked together.
Approach the operating carrier together if safe and practical, provide all relevant booking references, and ask staff to keep minors with their responsible adult. Confirm every new segment and any changed visa or transit requirement.
Ask whether the airline can reissue boarding passes for all four travelers in one step. Check each new pass for the correct names again, because a rebooked ticket is a new document that needs the same care.
If the rebooked flight falls on another day, update your itinerary copy for the embassy and for any hosts on arrival. Names stay the same, but dates and times change. Share the new version with every adult in the group, and replace the old one in every folder.
A Proactive Routine From Booking to Boarding
Build a routine around the actual carrier and destination rules, rather than treating one reservation, seat purchase or document bundle as a guarantee.
Follow this order:
- Confirm each passport name, date of birth and route.
- Check the issuer’s booking status and name-entry conventions.
- Match each application and any required child documents.
- Review seating and check-in arrangements directly with the carrier.
Repeat the name check one more time about a week before departure. Airlines sometimes change schedules, and a revised ticket could carry a new error. A short review catches it.
Share the routine with every adult in the group. If one person handles the paperwork and falls ill, another can take over without starting from scratch.
Treat this list as a living tool. Add steps that fit your route or your airline, and keep it for your next journey.
Four-Person Mixed-Surname Visa File: Final Reconciliation
In the hypothetical family, Emma, Lucas, Olivia and Margaret should each have a verified passport-name row, a matching application, and the correct booking segment. The child’s legal relationship and any required permission should be evidenced separately.
Before submission, compare the current issuer records, forms, dates and minor-travel documents. Repeat the checks before departure; a coherent file supports review but cannot guarantee a visa, boarding or entry.
Need a family flight reservation that reflects each real passenger and date? Check BookForVisa’s current booking, validity and correction terms before ordering.
Review flight-reservation optionsFrequently Asked Questions
Can relatives with different surnames share one flight reservation?
Often yes, if the issuer supports the passenger list. Each person must use the name accepted for that person’s travel document; the shared record does not prove a relationship or guarantee ticketing.
Do mixed surnames require a letter for every family visa?
Not universally. Follow the receiving authority’s checklist. A concise relationship explanation and the relevant records may help where the connection would otherwise be unclear.
Which document links a child to an accompanying adult?
It depends on the legal relationship and destination. Birth, adoption, guardianship, custody or consent records may be relevant; check the exact authority’s guidance.
Must a child’s travel-consent letter be notarized?
No universal rule applies. Canada’s guidance includes situations where a letter does not need certification, while other countries may have different formalities.
Does one PNR mean the whole family has paid tickets?
No. A PNR identifies a booking record. Confirm each traveler’s segment and any ticket issuance with the operating carrier or issuer.
What if one surname is misspelled after booking?
Contact the ticketing issuer promptly with the correct passport details. Correction scope, cost and deadlines vary by airline and fare; do not edit the PDF yourself.
Friendly reminder: BookForVisa provides travel-proof documents for planning and visa-application support. Requirements vary by destination, consulate, visa category and applicant situation. A flight reservation can support a file, but it does not guarantee approval, boarding or entry.