Short answer: A visa reservation for an archaeological field trip should match the travel dates and gateway airport confirmed by the host institution, project director and applicable visa checklist. First identify the immigration category for the participant's actual role, then confirm the project's archaeological authorization and the participant evidence the host can provide. The reservation should show a credible arrival before required orientation or fieldwork and a departure after the documented participation period without pretending that a project permit is a personal visa.
An archaeology student, volunteer, employed researcher, visiting specialist and project director can join the same excavation but face different immigration questions. The word “field trip” does not determine the visa category. The destination considers nationality, residence, duration, whether the activity is paid, the host relationship and the work the participant will perform.
The strongest travel file separates three layers: permission to enter and stay, authorization for the archaeological project, and evidence that the named applicant belongs on the team. A flight itinerary supports the travel layer. It cannot create excavation permission, replace a hosting agreement or guarantee that a tourist entry category covers research activity.
Key facts
- Do not assume every archaeological participant needs a visa named “research visa”; category names and eligibility differ.
- Project authorization and personal immigration permission are separate decisions.
- The host letter should identify the participant, project, site or region, role and confirmed dates when the authority requests those facts.
- Arrival and departure dates should account for documented orientation, internal transfer and fieldwork—not invented buffer rules.
- Transit permission, local registration, insurance and accommodation depend on the route and destination checklist.
- A reservation shows proposed flights; it does not prove payment, archaeological authorization, visa approval, boarding or admission.
Need flight proof for an archaeological project? Confirm your accepted role, host letter, destination category and project dates first, then prepare a reservation that follows the same route and calendar.
Prepare your field-trip reservationIn This Guide
- Choose the correct immigration category
- Build the supporting document stack
- Separate project permits from personal visas
- Match flights to the field calendar
- Create a credible reservation
- Compare destination decision paths
- Budget without invented program prices
- Connect the airport to the site
- Respond to delays or document requests
Official-source check: Jordan's Department of Antiquities says archaeological work requires an official excavation or survey permit application and lists project participants and the time plan among the required project information. Italy's Central Institute for Archaeology explains that archaeological research is conducted under a ministerial research concession. Romania's Ministry of Foreign Affairs separately lists a long-stay scientific-research visa category based on specified endorsements. These are destination examples, not interchangeable rules; use the current host, heritage authority and immigration instructions for the actual project.
Reviewed for: research-versus-tourist category risk, institutional host evidence, archaeological permission ownership, field-calendar logic, remote-site routing, current Jordan/Italy/Romania examples, U.S. and India search intent, conversion clarity and non-guarantee wording.
Choose the Immigration Category Before Reserving Flights
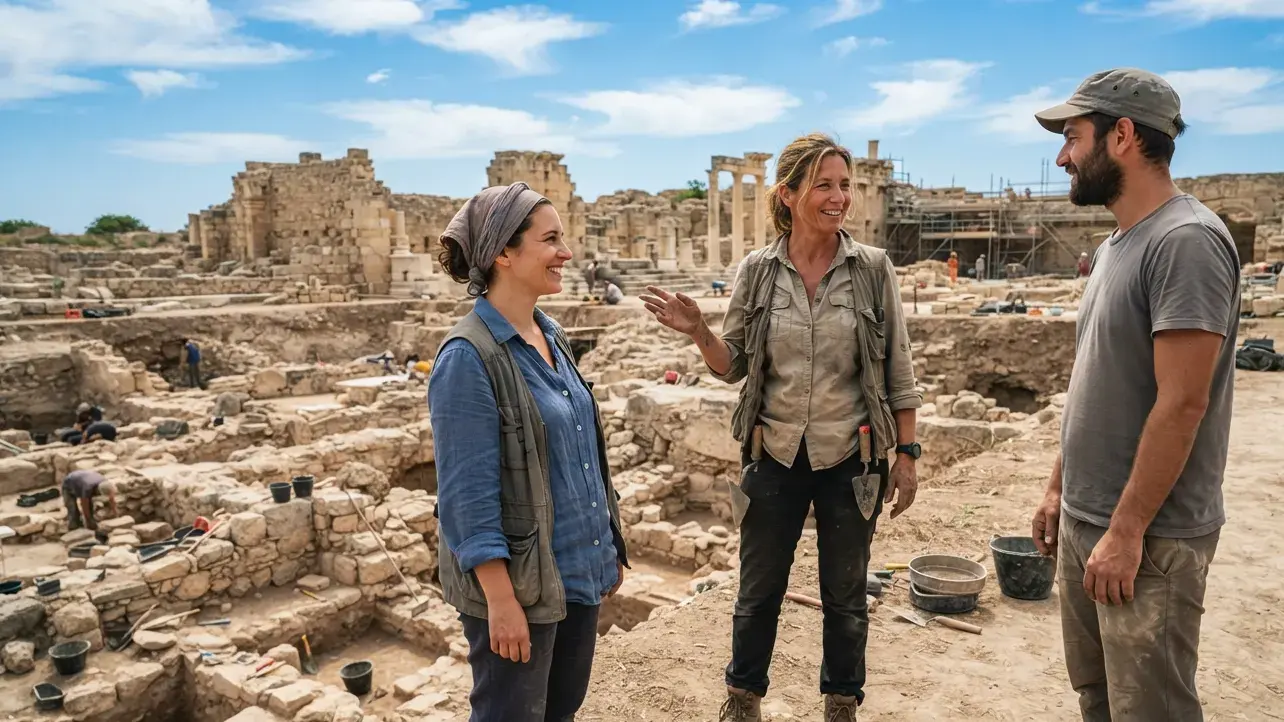
The first question is not “Which flight should I reserve?” It is “What activity will the destination consider me to be doing?” An unpaid field-school student, a volunteer, an employed archaeologist and a visiting academic may be classified differently even when they share transport and accommodation.
Describe the role before choosing the visa label
Write one factual sentence covering the participant, host, activity, site or region, duration and payment status. Send it to the host institution's international or project office and ask which immigration route it supports. Then verify the answer through the destination's official visa source or consular post.
| Participant profile | Questions that change the category | Useful host evidence |
|---|---|---|
| University field-school student | Is it credited study, training, volunteering or practical research? | Enrolment or acceptance letter, curriculum, host and dates |
| Graduate researcher | Is there a hosting agreement, funding or institutional research appointment? | Research invitation, funding evidence and role description |
| Short-term specialist | Is the person employed, paid locally or delivering a professional service? | Assignment letter, contract or specialist invitation |
| Volunteer participant | Does the destination treat the activity as volunteering, work, study or tourism? | Volunteer agreement and written host guidance |
| Project director or staff | Who is the employer and who holds the project authorization? | Employment, host and mission documentation |
Why a tourist assumption can fail
Tourism permission does not automatically authorize excavation, surveying, cataloguing, sampling or other project activity. Likewise, a project permit does not automatically give every foreign participant permission to enter or work. Treat the immigration decision and heritage authorization as separate checks.
Do not write that the applicant “needs a research visa” until the official source uses that category for the facts. Some destinations have scientific-research routes; others may classify a short course, volunteer placement, academic visit or paid activity differently.
For applicants traveling from the United States or India
The applicant's departure country helps determine where the visa is lodged and what proof of lawful residence may be required, but it does not decide the destination category. A U.S. resident and an Indian resident joining the same project can face different visa requirements because nationality, residence and passport type differ.
Use global English in the host letter and reservation, while following the post-specific checklist. If an Indian applicant files through a visa application centre, that centre may collect the documents, but the destination authority controls the visa decision. A U.S.-based applicant who is not a U.S. citizen should check whether the post accepts applications from residents and what residence proof is needed.
Start the clock from official dependencies
Do not impose a universal 90-day or 120-day schedule. Work backward from the field start using the current visa processing information, appointment availability, project-permit status, host-letter lead time and any security or research clearance. Create the flight reservation only when the route and intended window are credible.
Questions the itinerary should answer
- Does the gateway airport logically serve the host institution or site-transfer plan?
- Does arrival allow the documented orientation and transfer?
- Does departure follow the participant's confirmed end date?
- Does the stay length match the role rather than the full project season by default?
- Are transit, accommodation and return plans documented where required?
Build the Paperwork Stack Around the Same Field Project
Your flight reservation is one page in a thick file. Consulates read the whole stack together, so each document has to support the others.
Documents to Check for the Chosen Category
Many checklists begin with a valid passport or travel document and a completed application form, but the required set belongs to the specific authority and category. Start with that official list instead of copying a generic pack.
For the flight-proof layer, review the flight reservation for visa guide and then adapt the route and dates to the project evidence.
Passport-validity rules vary. Check the destination and transit requirements for the applicant's document and measure the required period from the date specified by the authority. Do not apply a universal six-month rule.
Your core set usually looks like this:
-
A passport or travel document meeting the destination and transit validity rules
-
The application form for the confirmed visa or residence category
-
Passport-style photos in the size the consulate lists
-
Your invitation letter and proof of affiliation
-
Financial proof and an insurance certificate
-
A dated flight reservation covering arrival and departure
Check each item against the consulate's own list. Requirements for the same visa can differ by the city where you apply.
Print the list and tick items off. It sounds basic. It prevents the rejections that come from one missing page.
Invitation Letters and Proof of Project Affiliation
Use the invitation, hosting agreement, acceptance or assignment document required for the chosen category. Where the checklist calls for an institutional letter, obtain it through the host rather than relying on an informal message.
Project-affiliation evidence may be required. It can take the form specified by the post, such as a hosting agreement, acceptance, assignment letter, participation record or named project list.
A strong invitation letter includes:
-
Your full name exactly as printed in your passport
-
The excavation name and its location
-
Start and end dates of your participation
-
The sponsoring institution and the name of its director
-
The permit number, if one has been issued
Those dates matter to your itinerary. If the letter says you will work from 6 June to 4 July, your reservation should arrive shortly before 6 June and depart shortly after 4 July.
Take Daniel, a field school student flying out of Mumbai. His letter listed 3 June as his first day. His reservation showed arrival on 14 June. The officer asked which date was correct.
Daniel asked the director for a corrected letter and updated his reservation. Both documents then told the same story.
Money and Insurance Evidence
Where the checklist asks for financial evidence, show how the participant will cover the full stay, return travel and any costs not paid by the host.
Depending on the checklist, evidence may include bank records, a sponsor letter, grant documentation or host funding confirmation. Use the form and coverage period the authority requests.
Use the insurance coverage required by the visa category and assess additional fieldwork risk separately. Remote-site evacuation, exclusions and work-related activity may matter even when they are not visa requirements.
Three details deserve attention:
-
The policy start date should cover your arrival day.
-
The policy end date should extend past your reservation's departure date.
-
The destination region must appear on the policy, not be excluded as high risk.
Remote sites sit hours from the nearest hospital. Insurers know this and price accordingly. Get quotes early so the certificate is ready when you submit.
Keeping Every Date and Reference Consistent
Your file contains dates from at least five sources. If any two disagree, you invite a query. A simple cross-check table keeps everything aligned.
|
Document |
Date It Fixes |
What It Must Match |
|---|---|---|
|
Invitation letter |
First and last day on the project |
Arrival and departure on your reservation |
|
Excavation permit |
Season window |
Letter dates and travel dates |
|
Insurance certificate |
Cover period |
Arrival through departure, plus a buffer |
|
Passport |
Expiry and issue dates |
The destination and transit document-validity rules |
|
Flight reservation |
Arrival and departure |
All of the above |
Add a small reference sheet for yourself. List the permit number, the letter reference, the policy number, and the reservation code. When an officer asks a question, you can answer in seconds.
Resolve mismatches before submission where possible. If a document changes during processing, follow the post's official update channel rather than silently replacing it.
Translations, Notarization, and Document Copies
Some consulates want documents in the local language or in English only. Others accept both. Ask before you submit, because a single untranslated page can send the file back to you.
If the checklist requires a translation, use the language, translator qualification and certification format specified by the post. Apply the same rule to host letters, funding records and other supporting documents.
Check separately whether originals, notarized copies, certified copies or electronic uploads are required. The acceptable format can differ by post and document type.
To ensure nothing slips through, keep three sets:
-
Originals for in-person appointments
-
Certified copies where the consulate asks for them
-
Digital scans saved in one folder with clear file names
Name files in a way that an officer would understand at a glance. Passport_Daniel_Wright.pdf is better than scan0042.pdf.
If you live far from the application point, add realistic time for courier delivery, translation and certification without assuming a universal filing window.
Finally, check page order. Many visa centers scan documents in the order you hand them over. Put the application form first, followed by identity documents, the invitation letter, financial proof, insurance, and the flight reservation.
With your documents lined up, the next question is who has to approve the dig itself before any seat is worth reserving.
Separate Project Permission From Personal Immigration Status
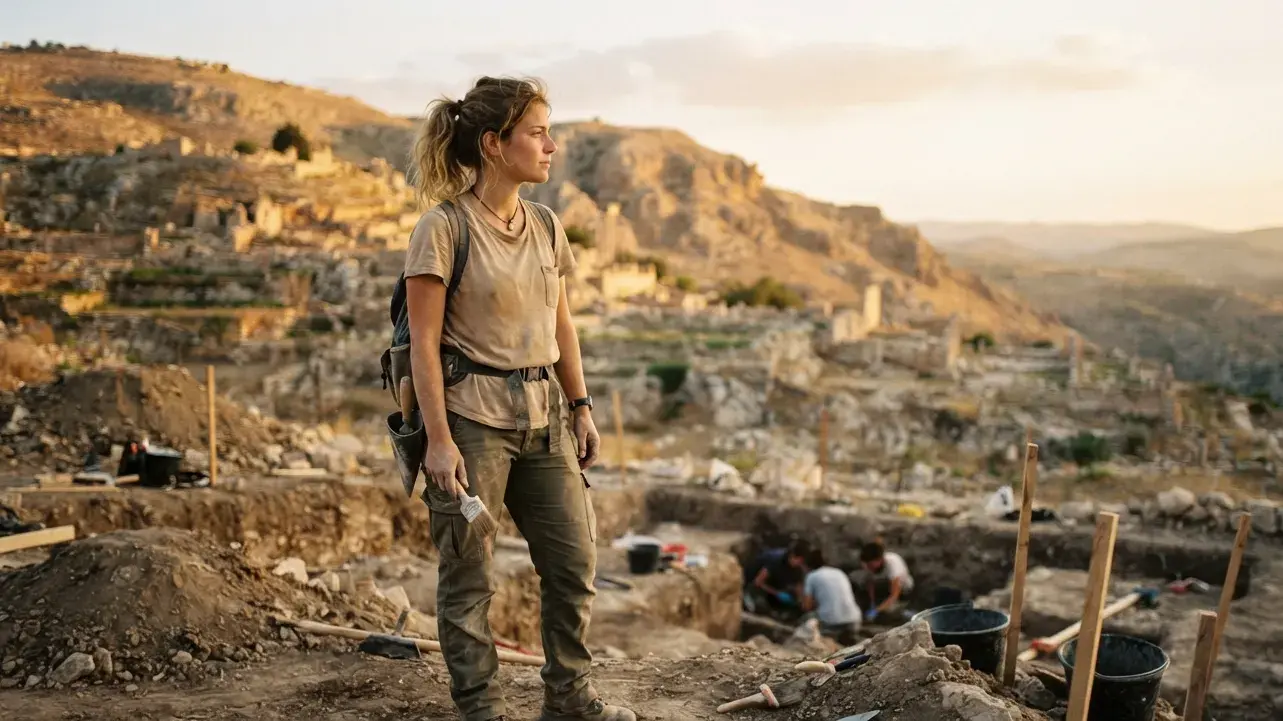
Archaeological authorization belongs to the project or responsible institution under the destination's heritage law. Personal immigration permission belongs to the traveler. A host letter can connect the two, but neither document automatically substitutes for the other.
Ask who holds the archaeological authorization
The responsible body may be a department of antiquities, culture ministry, research authority, territorial heritage office or another agency. The permit may be held by the mission director, university, foundation or concession holder rather than by each participant.
Ask the project director for the authorization status, the authority involved, the project title, season dates and whether individual participants are named or require separate forms. Do not demand a permit number if the authority does not issue or disclose one at that stage.
Use pending-permit evidence only when accepted
A host may be able to confirm that an authorization application is pending, but a consulate is not universally required to accept that letter. Before submitting, ask whether pending evidence is sufficient or whether final approval is mandatory for the chosen visa category.
Build one permission map
| Layer | Who controls it | What the traveler should verify |
|---|---|---|
| Passport or travel document | Issuing authority | Validity, name and blank-page or document conditions |
| Visa or residence permission | Destination immigration or consular authority | Category, duration, activity restrictions and application post |
| Archaeological project approval | Destination heritage authority | Project status, responsible institution and approved season |
| Participant affiliation | Host institution or project director | Named role, participation dates, funding and accommodation |
| Site access or equipment clearance | Project, local authority or security body | Whether extra access, drone, survey or sampling permission applies |
Do not overstate heritage-law rules
Finds, samples, photography, drones, survey equipment and publication can be regulated, but the exact rule belongs to the destination and project. Follow the project briefing and official permit conditions. Never remove material from a site or export it without explicit lawful authorization.
What the host letter should clarify
- the participant's passport name and role;
- the host institution and responsible project contact;
- the project name, site or region and participation dates;
- whether accommodation, local transfer or funding is provided;
- the project authorization status when relevant and disclosable; and
- the document's issuer, date and contact route for verification.
The destination checklist controls which of these facts are mandatory. A longer letter is not automatically stronger; it should answer the relevant questions without making claims the institution cannot support.
Match Flight Dates to the Excavation Calendar
Dig seasons run on a calendar. Your reservation should read as if it was built from that calendar, not from the cheapest fare.
Reading the Season Dates Like a Consular Officer
Officers look for a clean, logical window. They see your permit dates, your letter dates, and your flight dates. If all three line up, the file looks organized and credible.
Start with the project's published season. Most teams announce an opening day, a closing day, and a short setup period. Write all three down.
Then mark the dates that matter to a consulate:
-
First work day: The earliest date your presence is needed.
-
Last work day: The final day of your participation.
-
Site closing: The date the team leaves and the site is secured.
Arrival should allow the documented orientation and transfer, while departure should follow the participant's confirmed end date. Any extra days should be truthful, lawful and supported by accommodation and purpose evidence when the checklist requires it.
Teams working in summer often follow short seasons because heat and heavy tourist traffic limit access. A six-week permit leaves little room for personal side trips, and officers expect that.
Arrival Buffers That Protect Your Permit Start
Arriving the same day your work starts is risky. A late connection or a long immigration queue can cost you the first morning. Some teams hold an orientation on day one that you cannot afford to miss.
Use the transfer time, group pickup, orientation schedule and connection risk to choose a practical arrival. The host should explain any required early arrival.
If arrival precedes project activity, document the reason, accommodation and lawful purpose rather than relying on a universal maximum buffer.
Here is a simple rule:
-
Short transfer to the site: arrive one day early.
-
Long overland leg or border formalities: arrive two days early.
-
Team meeting before the dig: arrive on the date the director sets.
Write the director's guidance into an email. That message becomes useful evidence if the consulate asks why your arrival precedes the permit start.
Departure Dates, Visa Validity, and Post-Arrival Registration
Certain countries require post-arrival registration to convert entry clearance into a temporary research residence permit. You may need to register with a local authority within days of landing.
This affects your plan in two ways. First, you must build time into the first week for the visit to the registration office. Second, your visa and residence permit need dates that match your return flight.
Ask the director or the host institution these questions:
-
How soon after arrival must you register?
-
Who accompanies you to the appointment?
-
What documents will the office request?
-
How long does the residence permit stay valid?
If your residence permit ends on 5 July, a return flight on 12 July puts you out of status for a week. Fix that before it happens.
Leave a small margin after your last work day. A one-day cushion covers a missed transfer. A full week creates risk.
Remember, too, that some officers compare the permit's final day with your departure. A tidy match signals that you intend to leave on time.
When Your Team Shifts the Opening Week
Seasons move. A late permit, a weather event, or a funding delay can push the opening week back. Your flight reservation should not collapse when this happens.
Build flexibility from the start. Choose reservation terms that let you move the date without starting over. That way, a two-week shift becomes a small edit, not a restart.
When the director announces a change:
-
Ask for the new dates in writing.
-
Request an updated invitation letter.
-
Revise your reservation to match.
-
Notify the consulate if your application is already under review.
A short note with the new letter and revised itinerary creates a consistent record. Follow the post's instructions on whether and how to submit that update.
If the visa has already been issued, check its validity window. An entry date that no longer fits your plan may require a new visa or an amendment.
Build a Dependency Timeline Instead of Using Fixed Months
A useful timeline records dependencies rather than invented deadlines. Enter the actual dates published or confirmed for the project and update them when the responsible authority changes the plan.
| Milestone | Source of the date | Reservation impact |
|---|---|---|
| Visa category confirmed | Official immigration source and host | Defines the document checklist and permitted activity |
| Project or permit status confirmed | Responsible institution or heritage authority | Shows whether the season is sufficiently certain |
| Participant dates confirmed | Invitation, hosting or assignment document | Sets the proposed stay rather than the full season by default |
| Gateway and transfer confirmed | Project logistics contact | Sets the arrival airport and realistic arrival date |
| Visa application submitted | Post or application centre | Identifies the itinerary version retained with the file |
| Decision received | Visa authority | Triggers final ticket purchase only when the trip remains viable |
Keep each version of the reservation and note which supporting letter it matched. If the season changes, update the host evidence and follow the visa office's instructions before replacing a document already under review.
Build a Flight Reservation That Is Easy to Review
A reservation for fieldwork travel should make the proposed journey clear, consistent and easy to update.
What a Reviewer Needs to Find on the Page
The core details should be visible without relying on cropped screenshots or detached notes.
-
Your name matching the passport exactly
-
Departure and arrival cities that make sense for the destination
-
Dates that fit the permit and letter
-
A return or onward leg that shows you will leave
-
A booking reference they can verify
A clean layout matters. Cluttered screenshots or cropped pages look careless. Use a clear PDF with complete flight details.
Carrier familiarity does not make a reservation stronger. What matters is that the provider creates a truthful record with the correct passenger, route and dates and that the output is represented accurately.
Make sure the reservation does not include extra legs that raise questions. A research file should show a simple outbound journey and a clear return.
Choosing a Route That Looks Like a Researcher's Route
A route says something about your purpose. If your dig is in southern Jordan, flying into Amman or Aqaba makes sense. A routing through three unrelated countries does not.
Choose the gateway closest to the site that the team also uses. Ask the director which airport the group meets at. Teams often arrange shared pickups from one specific arrival point.
Route complexity is not automatically a problem. When a connection is indirect, make sure it remains feasible and that you can explain the airline network, fare, meeting point or transfer reason without inventing facts.
Check whether the route requires a transit visa. Some hubs require one even for airside connections, depending on your passport. This can complicate a file that is otherwise perfect.
Keep the route simple enough that you can explain it in one sentence: I fly from Delhi to Amman, meet the team, and travel to the site.
Reservation Details That Are Easy to Review
A reservation should carry a genuine booking reference and accurate itinerary details. Public airline lookup availability varies, so do not promise that every authority can verify every record through the same website.
Look for these details:
-
A genuine booking reference issued with the reservation
-
Passenger name, route, and times that match the PDF
-
A reference you can quote when asked
-
A document that opens cleanly and prints legibly
Review the provider's current terms for reservation status, delivery, changes and validity. Do not advertise a fixed price, unlimited changes or universal airline verification unless those terms are confirmed for the specific order.
Do not rely on handwritten edits or screenshots. A formal PDF carries more weight, and it prevents formatting errors from raising doubts.
Keep a digital copy and a printed copy. Some visa centers ask for paper, and some ask for an upload. Be ready for both.
Planning for Date Changes Without Starting Over
Your reservation may change at least once. Permits move, letters get reissued, and consulate appointments slip. Plan for this from day one.
A reservation with flexible date changes saves effort. You update the date, receive a fresh PDF, and attach it to the updated file. No new purchase, no scramble.
Compare that with a standard paid fare. Low-cost airline fares can carry heavy change fees. Even a flexible fare may charge a difference in price when dates move. Those costs add up when you are also paying for field program fees.
Keep a log of every version you create:
-
Version number
-
Date issued
-
Reason for change
-
Documents it was submitted with
If the consulate asks about an older version you sent, you can explain the update calmly and clearly.
Mistakes That Make a Reservation Look Weak
Even a good reservation can undermine your file if small errors slip in. Watch for these patterns.
-
Name mismatches: A missing middle name or a swapped surname order draws attention immediately.
-
Impossible connections: A layover of twenty minutes between terminals looks careless.
-
Odd travel dates: A flight on a day with no scheduled service for that route raises doubts about seat availability.
-
Return flights from a different country: Unless you have a reason, the return should leave from the same region you arrived in.
-
Old documents: An expired reservation or a PDF with outdated dates makes the file look neglected.
Another common problem is mixing up time zones. If your itinerary shows an arrival on 6 June but your letter says you must arrive on 5 June, the officer may assume you misread the dates.
Always read the PDF line by line. Compare the passenger name to your passport, the dates to your letter, and the airports to your route. It takes five minutes.
Ask a friend or colleague to double-check. A second reader catches typos that your eyes skip.
Finally, avoid adding extras. Seat selections, meal requests, and add-ons have no place in a visa reservation. Keep it simple and let the core details speak for themselves.
Matching Reservation Length to Your Role on the Dig
Not every participant stays for the full season, and your reservation should say so honestly. A specialist who joins for ten days should show ten days. A student on a full session should show the whole stretch.
Mismatched lengths are one of the quickest ways to draw a query. Officers compare the stay on your invitation letter with the stay on your itinerary. When the numbers differ, they ask which one is true.
Consider three common patterns:
-
Full-season participants show arrival before the opening day and departure after closing.
-
Short-term specialists show arrival and departure around a single task window.
-
Staggered teams show dates agreed with the director, who may rotate people through the season.
If the trip includes personal days, disclose them where required and ensure the full stay is lawful, funded and accommodated. Do not hide part of the intended journey or assume the visa can be extended after issuance.
Ask the director to confirm your exact dates in an email. Quote that email in your cover note. It gives the officer one more reason to trust the match.
Once the reservation is set, entry rules in specific countries become the next layer to understand.
Jordan, Egypt, Italy and Romania: Four Decision Paths
These destinations illustrate why archaeology travel cannot use one visa template. The comparison identifies the authority questions to ask; it does not assign a visa category based only on the country name.
Jordan: Department of Antiquities authorization
Jordan's Department of Antiquities publishes a permit process for archaeological excavations and surveys. Its official page asks for the research project, executing party, participants, time plan, methodology and security forms. The project director or responsible institution should explain how the traveler appears within that process.
Separately, confirm the participant's entry and activity permission through the official Jordanian visa or consular source for the nationality and role. The reservation should use the gateway and dates confirmed by the project, not assume that holding a tourist entry permission authorizes fieldwork.
Egypt: distinguish entry permission from mission approval
Egypt's official eVisa portal covers eligible electronic visa applications, but an eVisa is not evidence that an archaeological mission or participant activity has heritage authorization. Ask the host which antiquities, security or site approvals apply and which document the visa post needs.
Do not embed a season, permit lead time or escort rule without a current official source for that project. Create the flight reservation after the host confirms the gateway, participation dates and any arrival procedure.
Italy: ministerial research concessions
Italy's Central Institute for Archaeology states that archaeological excavation and specified research activities operate under ministerial concessions. The concession holder bears responsibilities for the work and participants. A visiting student should therefore obtain evidence from the responsible institution rather than applying for an excavation concession personally unless the official procedure says otherwise.
Immigration status remains a separate question. EU/EEA/Swiss status, nationality, duration, payment and the nature of the activity can change the applicable route. Schengen short-stay limits do not by themselves authorize work or research.
Romania: do not publish a universal visa-free claim
Romania's Ministry of Foreign Affairs lists a long-stay scientific-research visa marked D/CS for qualifying third-country nationals and specifies endorsements and a hosting agreement. That does not mean every field-school participant needs D/CS, nor that every nationality can enter visa-free for a fixed twelve-week period.
Use the Romanian eVisa eligibility and supporting-document tools for the applicant's nationality, role and stay. Confirm whether a short course, volunteering, paid work or formal scientific research fits a different route.
| Destination | Project-level question | Personal immigration question | Reservation check |
|---|---|---|---|
| Jordan | What Department of Antiquities permit covers the mission and participants? | What category permits this traveler's actual role? | Use the team gateway and approved season. |
| Egypt | Which mission, site and security approvals apply? | Is the traveler eligible for the chosen entry route and activity? | Keep dates adjustable until the host confirms the window. |
| Italy | Who holds the ministerial research concession? | What immigration route follows from nationality, duration and activity? | Include lawful personal days and internal travel. |
| Romania | What host or research authorization supports the role? | Does the case fit D/CS or another official route? | Match the host agreement and intended stay. |
The country name is only the first filter. The exact post, passport, residence, duration, funding and activity determine the next steps.
Budget for the Field Season Without Invented Prices
Program fees, deposits, transfers and daily costs belong to the specific project. Remove copied fixed prices unless they come from the applicant's current acceptance materials. The visa file should use the real budget and funding evidence for that season.
Separate refundable and non-refundable commitments
Ask the program for written payment, cancellation, deferral and visa-refusal terms. Record the amount and deadline for each item rather than assuming every registration charge is non-refundable.
- application or registration fee;
- tuition, participation or research charge;
- accommodation and meals;
- airport or station transfer;
- site transport, tools and protective equipment;
- insurance and any fieldwork extension;
- visa, permit, translation and courier charges; and
- final airfare and contingency funds.
Use a reservation to manage airfare timing honestly
When the destination accepts a reservation rather than a paid ticket, proposed flight proof can reduce exposure to a non-refundable fare before the decision. It does not eliminate the program deposit or guarantee that later fares will be cheaper.
The term “dummy ticket” is often used loosely. This dummy ticket for visa explanation distinguishes a temporary issuer-generated reservation from an edited or fabricated document. Describe the reservation accurately and never alter it to imitate payment or ticket issuance.
Build a case-specific budget table
| Cost | Confirmed amount | Due date | Refund or deferral rule | Evidence |
|---|---|---|---|---|
| Program participation | From current offer | Project deadline | Written project terms | Invoice or acceptance |
| Accommodation and meals | Included or separate | Host schedule | Booking or project terms | Host letter or reservation |
| Local transfer | Group or private rate | When dates are firm | Transfer-provider terms | Project logistics email |
| Insurance | Quoted premium | Before application or travel | Policy cancellation terms | Policy certificate |
| Final flight | Current fare | After visa or when risk is accepted | Fare rules | Issued ticket |
Connect funding evidence to the trip
The destination checklist determines the required financial evidence. A grant, university funding, employer support, personal funds and host-provided lodging can cover different parts of the budget. Explain who pays for each major item and avoid double-counting a benefit already included in the program fee.
For the broader difference between itinerary proof and a purchased fare, review the visa flight itinerary requirements guide before making a non-refundable commitment.
Plan the Route From Arrival Airport to the Site
Most excavations sit far from major airports. Your route from the arrival gate to the trench is part of your plan, and consulates sometimes ask about it.
Choosing the Gateway Airport
Pick the airport your team uses. Ask the director where the group meets and whether a shared pickup exists. Teams often coordinate arrivals to reduce logistics.
Consider three factors:
-
Distance to the site: Closer is usually better, but only if the connection is reliable.
-
Flight frequency: A busy hub gives you backup options if a flight is cancelled.
-
Ground transport: Check whether the airport has safe, licensed transfers.
A small regional airport may look convenient but offer one flight a day. If that flight is cancelled, you lose a full day. A larger hub with a longer drive may be the safer base.
If the dig lies on the east side of a country and the main airport sits in the west, look at domestic connections. Overland travel across a whole country may be slower than a short domestic hop.
Share your choice with the director before you finalize it. They may know a detail that changes your plan.
The Airport Transfer Question
The project may arrange a group transfer or recommend a licensed provider. Confirm the current price, pickup window, payment method and cancellation terms in writing.
Ask whether the transfer is optional. If you arrive outside the scheduled pickup window, you may need a private car, which can cost more.
Your reservation should show an arrival time that fits the group schedule. Landing at 3 a.m. when the bus leaves at noon forces extra expense or a long wait.
Think about these practical points:
-
Does the bus leave at a fixed time or wait for late arrivals?
-
Is the cost shared or per person?
-
Will the driver have your name on a list?
If you travel from Delhi or Mumbai, long-haul timing can make arrival hours awkward. Compare options with a daytime landing so you reach the site in good shape.
Confirm the details by email and keep the message handy. Drivers sometimes ask for proof when they collect participants.
Layovers and Stopover Logic
A layover shapes your itinerary. Officers may ask why you route through a particular city, so choose a stop that feels natural.
Look for these signs of a sensible layover:
-
It sits roughly on the path between your origin and destination.
-
It is long enough to connect, but not so long that you leave the airport.
-
It does not require a separate visa, or you have checked the transit rules.
Avoid overnight stays that you cannot explain. If a long layover forces a stay, note where you will sleep and keep that information ready.
Some teams recommend a short rest in the destination city before the long drive to the site. That works when your permit begins a day or two later. Just make sure your reservation reflects it.
If the trip includes personal travel, disclose it where required and include the accommodation, internal transport, funds and lawful stay in the overall plan.
Coastal Crossings and Sea Legs of the Journey
Some excavations sit on islands or along a bay, where the last leg of your trip may involve a ferry. Teams working in the Mediterranean, for example, often sail from a mainland port to reach an island site.
Ferry schedules are less flexible than flights. Winter timetables can be thin, and weather can cancel sailings. Even in summer, popular routes may fill early.
If your route includes a sea crossing:
-
Ask the director which operators the team uses.
-
Check the timetable against your arrival time.
-
Note that sailing times may differ on weekends.
-
Keep a printed copy of the ferry booking.
The flight reservation need not contain a separate ferry segment, but the supporting itinerary should explain any essential onward transfer when the checklist or route logic requires it.
Sites surrounded by water can also have limited accommodation, and teams usually book it in bulk. Do not arrange anything separately unless the director asks you to.
Team lodging can support accommodation evidence when the host letter or booking satisfies the destination checklist. Do not assume the flight is the only travel proof required.
Safety and Insurance on the Last Leg
The last leg is often the riskiest. Roads can be rough, signal can be poor, and help can be far away. Safety planning matters here as much as the permit.
Before you travel, confirm these items with the team:
-
Who meets you at the airport or port
-
How they will recognize you
-
Where the first night will be spent
-
Which emergency number to use
Keep your insurance details close. Save the policy number, the emergency hotline, and your reference on your phone and on paper.
Share your itinerary with someone at home. A simple message with your flight times and the team contact is enough. It adds a layer of safety and gives your family peace of mind.
Check the destination's travel advisories before you leave. Conditions change, and a quick look at your government's guidance can shape how you move.
Local culture also deserves respect. Modest dress, polite greetings, and awareness of customs go a long way, especially in rural communities that host the excavation.
What the First Week Feels Like on Site
Your first days set the tone for the season. Knowing what to expect helps you plan your arrival and avoid unpleasant surprises.
Most teams use the first day for orientation. You meet the staff, receive safety instructions, and see the trench layout. Some directors also walk the group through the nearest town so everyone knows where to find food, water, and a pharmacy.
By day two, you may be handed a trowel. The work starts slowly, and the details matter. Each layer of soil is recorded, and every find is logged.
There is a kind of magic in the moment you uncover something that has been buried for centuries. It is also tiring work, so arrive rested. A traveler who lands exhausted after a long overland leg will struggle in the first week.
Bring what the team recommends, including a hat, sturdy boots, and a refillable bottle. Packing lists usually come with the invitation letter.
Staying healthy matters just as much. Drink water, eat well, and tell the director if you feel unwell. Small problems can grow quickly in remote settings.
Even a well-planned route can meet trouble on paper, so it helps to know how to respond when a file stalls.
When the Visa File Is Delayed or Questioned
Even careful applicants hit problems. What matters is how quickly you respond and how clearly you fix the issue.
Responding to a Consular Query About Your Itinerary
A document request or query is not the same as a refusal. Respond through the stated channel, by the stated deadline, with the requested explanation and evidence.
Common itinerary questions include:
-
Why does your arrival precede the permit start?
-
Why does your departure follow the last work day?
-
Why does the route include a particular layover?
-
Is the reservation confirmed?
Reply in a short, factual message. State the question, give the answer, and attach the supporting document. Skip long explanations.
Example: Your arrival on 2 June precedes the permit start on 4 June because the director scheduled an orientation on 3 June. The attached letter confirms this.
Keep the tone polite and direct. Officers handle many files, and clarity helps them move yours forward.
If the query concerns the reservation, update it only as the authority requests and explain what changed. Retain the earlier submitted version and the new one.
Visa Processing Delays and Shifting Reservation Dates
Processing delays happen. A busy season, a missing clearance, or a ministry backlog can push your decision past the date you hoped for.
Track the case through the official channel and check whether the post publishes any priority or urgent process for the circumstances. Do not assume research travel qualifies for expedited treatment.
If the delay pushes you past your planned arrival, speak with the director right away. Teams sometimes allow a late start, and they may be able to update your invitation letter.
Then adjust your reservation. Pick new dates that match the revised plan, and keep the documents consistent. If you have already purchased a ticket, check the change policy.
A changeable reservation can reduce financial exposure, but the visa office may require an updated host letter, form or accommodation evidence as well.
Keep a record of every contact with the consulate. Dates, names, and reference numbers help if you need to escalate.
If the Visa Is Refused
If the visa is refused, read the notice and the official review, appeal or reapplication instructions. Do not assume the same remedy or deadline applies at every post.
Common reasons include:
-
Missing or inconsistent documents
-
Unclear purpose of travel
-
Insufficient financial proof
-
Permit not yet issued
Ask the director for support. They may know how to resolve the issue with the ministry or can write a clarifying letter.
Check the appeal or reapplication rules. Some consulates allow a quick resubmission with corrected documents. Others require a waiting period.
Do not rush to apply again with the same file. A repeat application with the same errors is likely to meet the same result.
If your registration fee is already paid, ask the program whether a deferral to a later session is possible. Some programs allow it even when fees are non-refundable.
Reapplying Without Repeating the Same Mistake
A second application should look better than the first. Build it deliberately.
Use this checklist before you resubmit:
-
Compare every date across your documents.
-
Confirm that the permit status is current.
-
Update the invitation letter if needed.
-
Refresh the flight reservation with matching dates.
-
Add a short cover note that addresses the earlier refusal.
The cover note should be brief. Acknowledge the earlier issue, explain what you corrected, and list the new documents. Officers appreciate a clear, organized file.
Ask a colleague or a faculty adviser to read the file before you submit. A fresh pair of eyes often catches mismatches you missed.
Finally, give yourself more time. If the season starts in June, aim to resubmit well ahead so there is space for a second review.
A corrected application can address a documented issue, but no reapplication outcome is guaranteed. Use the refusal notice and qualified advice where necessary.
Building a Backup Plan Before You Fly
Good preparation does not end when the visa arrives. A backup plan protects you from the small failures that ruin otherwise strong trips.
Start with the documents. Carry printed copies of your visa, invitation letter, permit page, insurance certificate, and flight reservation. Keep digital copies in cloud storage and offline on your phone.
Then think about contacts. Save these numbers before you leave:
-
The project director and a second team member
-
The host institution's office
-
Your embassy in the destination country
-
Your insurer's emergency line
Next, consider travel disruptions. If a connection fails, who do you call? Where can you wait? Having a short list of answers saves hours of stress.
Arrange a way to pay for unexpected costs. A small cash reserve and a card that works abroad can cover a taxi, a night of lodging, or a rebooked ticket.
Finally, share your plan with a trusted person at home. They do not need every detail, just the dates, the team contact, and the insurance number.
Staying Calm When the Calendar Tightens
Tight calendars create pressure, and pressure creates mistakes. When time runs short, slow down on the details that matter most.
First, protect the core documents. The invitation letter, the permit page, and the flight reservation must agree. A fast but inconsistent file costs more time than a slower, clean one.
Second, talk to your director early. Directors have handled this many times, and they often know which consulate officers respond quickly. They can also confirm whether the team will hold your place for a short delay.
Third, ask whether a late arrival is acceptable. Some projects welcome people a week after opening if the visa comes late. Others cannot absorb the gap.
Do not skip steps to save time. A missing signature or a wrong date can reset the clock. Check each page once more before you press submit.
Finally, keep your reservation flexible until the visa is in your passport. That freedom lets you pivot without losing money, and it keeps your focus on the research that brought you here.
Final Archaeological Field-Trip Reservation Check
- Describe the participant's actual role, payment status and duration.
- Confirm the immigration category through the official destination source.
- Identify the institution or director responsible for archaeological authorization.
- Obtain the host, acceptance, hosting or assignment document required for the category.
- Match participant dates—not automatically the full season—to the reservation.
- Use the gateway and internal transfer confirmed by the project.
- Check every transit point and any post-arrival registration requirement.
- Align accommodation, insurance, funding and personal travel with the complete stay.
- Keep version records if the permit, invitation or itinerary changes.
- Buy the final ticket only when the visa and project remain viable or when the fare risk is consciously accepted.
Ready to prepare the field-trip itinerary? Once the host has confirmed the participant role, project window and gateway, create flight proof that follows the same documented research plan.
Create your archaeological trip reservationFrequently Asked Questions
Do archaeological field-trip participants always need a research visa?
No. The appropriate category depends on the destination, nationality, residence, duration, payment status and whether the activity is study, training, volunteering, employment or formal research. Confirm the participant's facts with the host and official visa source.
Is an excavation permit the same as a visa?
No. Archaeological authorization allows an approved institution or project to conduct specified heritage work, while a visa or residence permission controls the traveler's entry, stay and permitted activity. One does not automatically replace the other.
What dates should the flight reservation show?
Use the participant dates confirmed by the host, including documented orientation and realistic site transfer. Departure should follow the participant's work or study period, while any personal days must remain lawful and be supported where the checklist requires them.
Can I apply while the archaeological permit is pending?
Only if the visa post accepts pending-project evidence for that category. Ask the host what confirmation it can issue and check whether the consulate requires final authorization before submission or decision.
Should I buy the final flight before the visa decision?
Follow the destination checklist and assess the fare risk. When a reservation is accepted, it can show proposed travel without an inflexible purchase, but it does not guarantee approval or protect program deposits and later airfare.
What if the field season dates change after submission?
Obtain the revised dates from the host, update the invitation and connected accommodation or insurance where necessary, and follow the visa office's instructions before replacing the itinerary already submitted.
This article provides general information and is not legal, immigration, archaeological-permit, airline, consular, insurance or travel advice. Requirements vary by nationality, residence, destination, transit point, project, participant role and individual circumstances. Confirm current rules with the relevant embassy, immigration authority, heritage authority, host institution and airline before applying or traveling.